His 4th birthday that I’m celebrating with him <3 Time flies indeed!
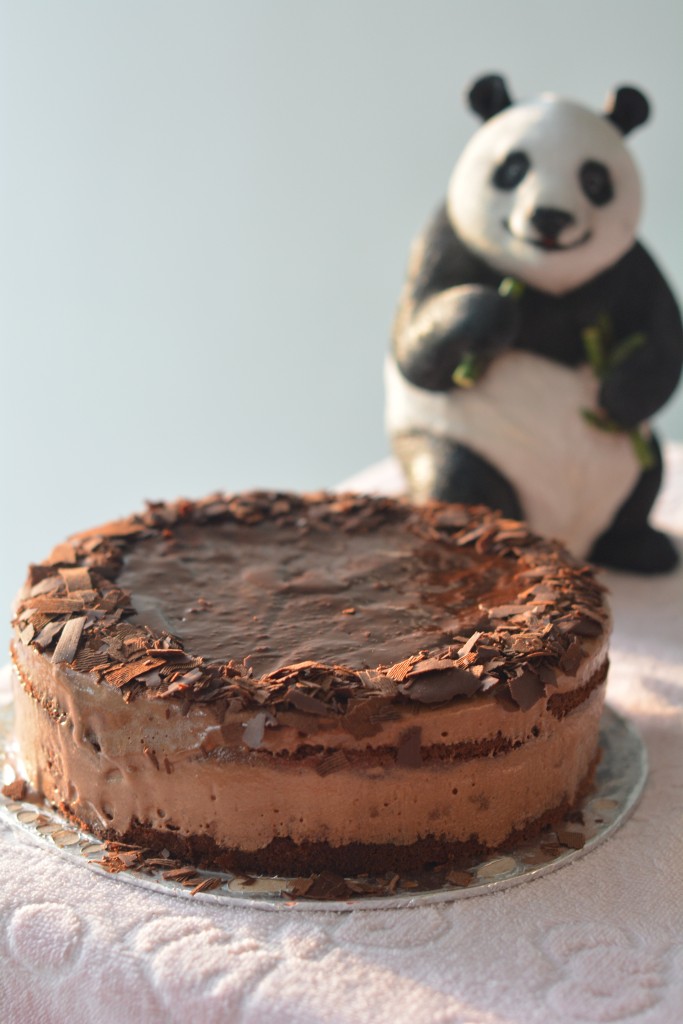
A homemade Hazelnut Feuilletine Cake
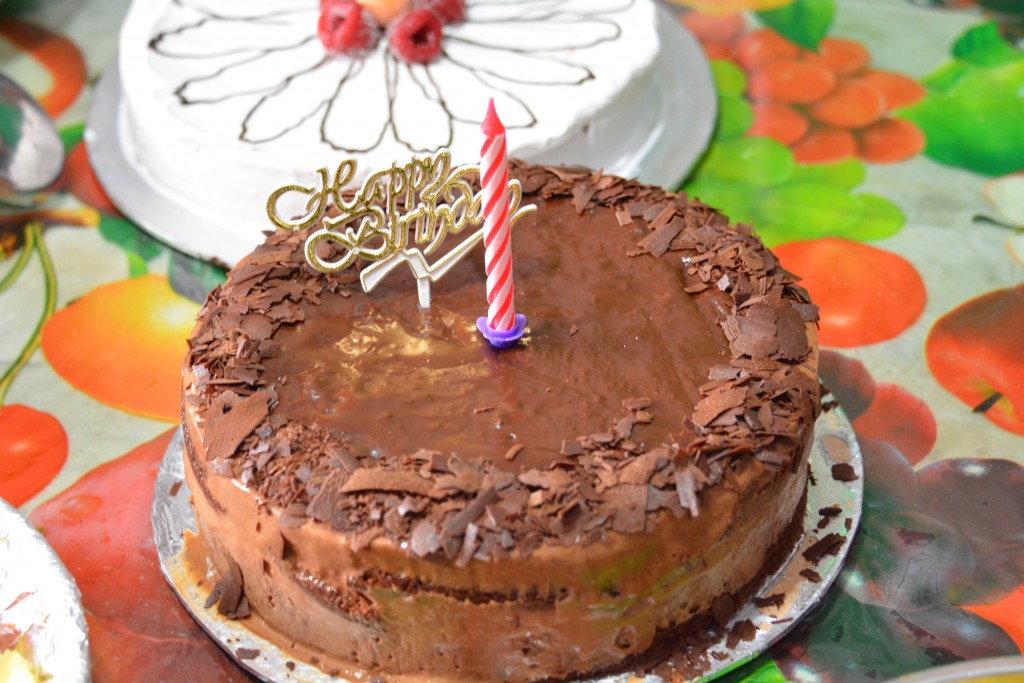
Happy Birthday, my love!
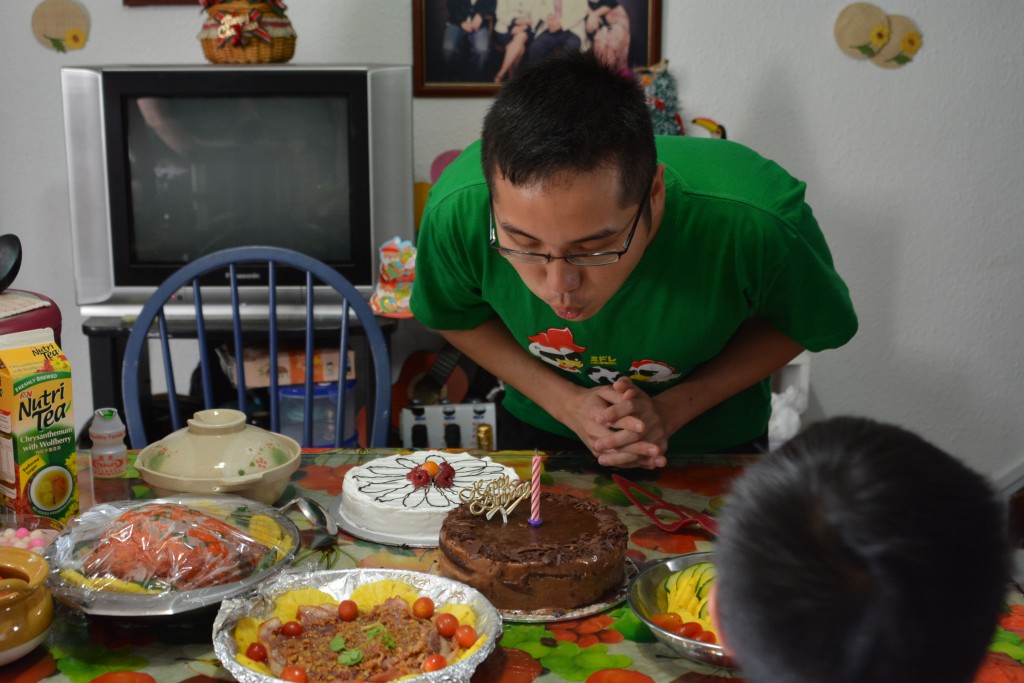
To a happy year ahead!
Hohoho Merry Birthday, Mister!
His 4th birthday that I’m celebrating with him <3 Time flies indeed!

A homemade Hazelnut Feuilletine Cake

Happy Birthday, my love!

To a happy year ahead!
Hohoho Merry Birthday, Mister!
One year up in age, and hopefully one level up in wisdom as well!
But nope, no hello kitty cake this year. Instead, I decided to use what little time I have to make a carrot and spinach cake for my co-birthday star, my dearest Spencer boy!
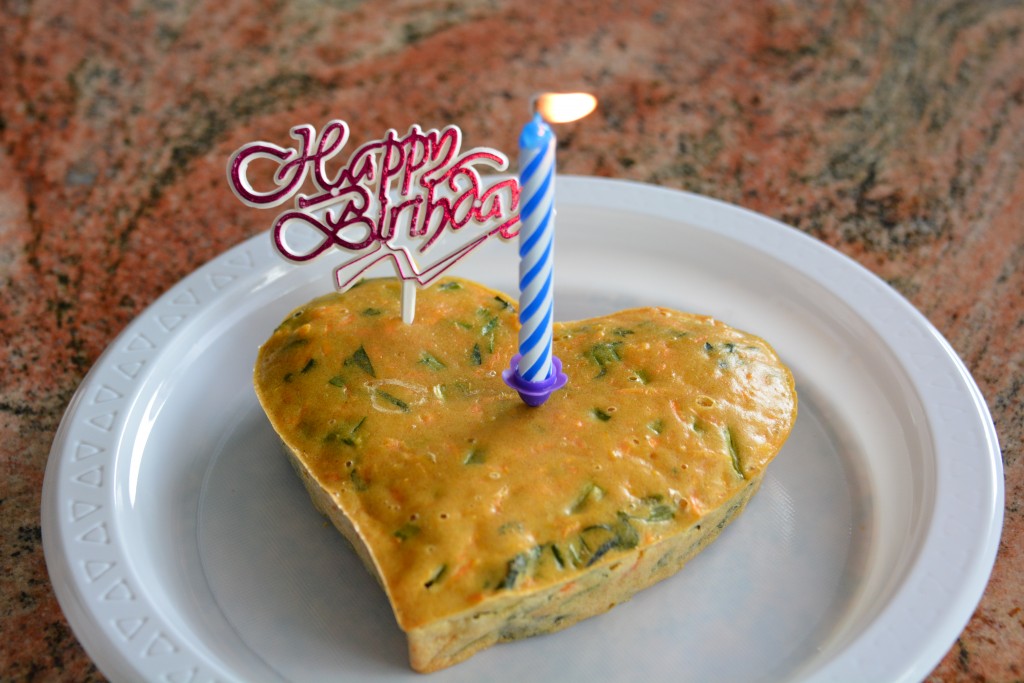
A wholesome heart-shaped carrot and spinach cake
He turned 9 this year, but it’s the first time that we are celebrating his birthday with a cake and a song, and hey he was really, really happy to be the star of the day. We celebrated his birthday with immense love and a thankful heart. And good health is all that we want for him. Hopefully, his arthritis remains under control and he could enjoy the rooftop for a couple more years. Keeping our fingers crossed for him.
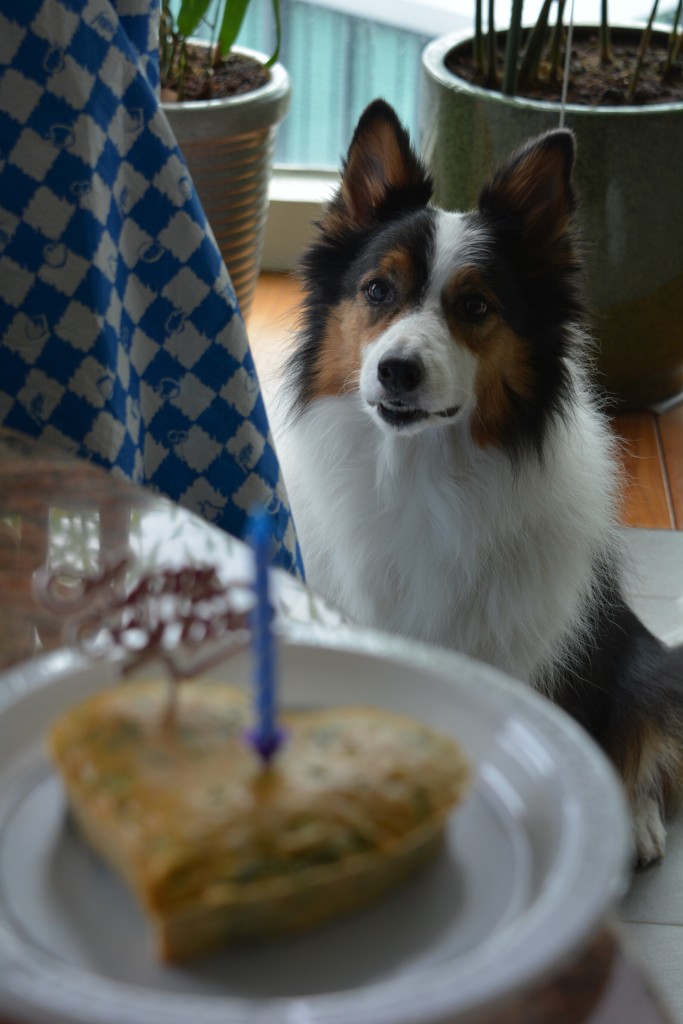
My smart boy knows that the cake is specially baked for him
His cake tasted a little bland to the human taste buds, but he truly enjoyed it nevertheless. Some carrots and spinach would definitely do his digestive system some good. I was so worried that he would sniff the cake and walk away uninterestedly. Thankfully, he gave his cake a chance, and really loved his cake! And knowing that he enjoyed his cake means the world to me.

My happy boy!
As for me, it was a quiet and simple birthday celebration with Mister and my family. A hearty lunch at Charly T’s with compliments from Citibank, an afternoon movie ‘Frozen’, a home-cooked meal with my favourite childhood vegetable dish, a mango yogurt cake sponsored by Mister and a short viber chat with my sister in Japan.
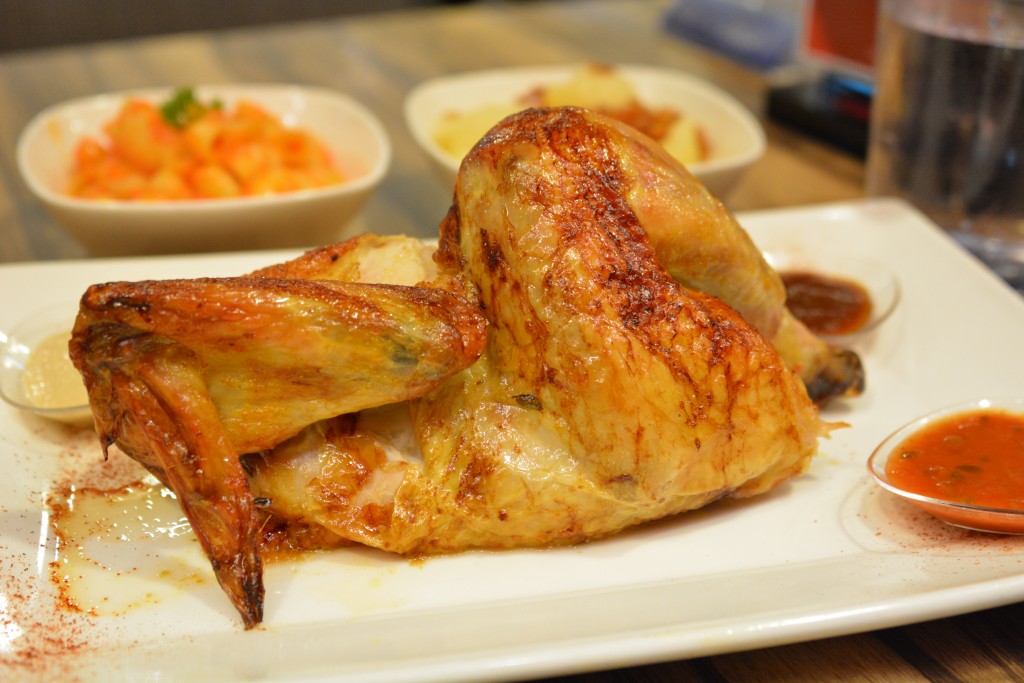
Kampung chicken at Charly T’s
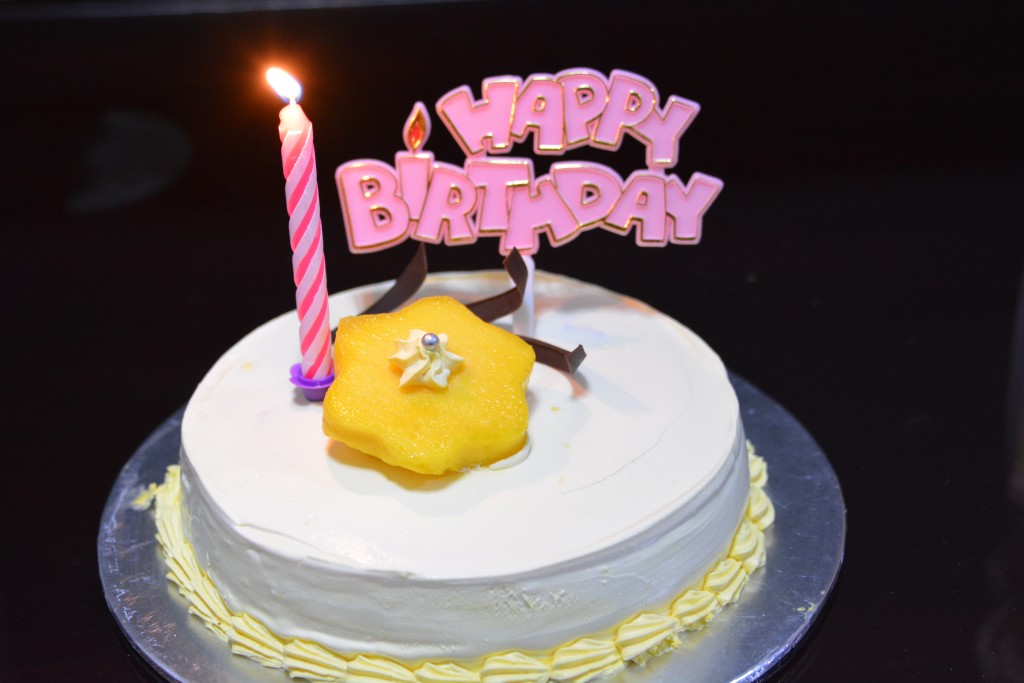
Happy birthday to ME!
Life was definitely good on my birthday! Thanks to everyone for your birthday wishes to Spencer and myself!
Oh and Miss Bakerholic on Cycliclapse turned one. So it’s one up for this blog too!
Taipei, I’m beginning to feel the charm of this city. Apart from the slight shock that 西门町 has no shopping centre which is way different from my pre-conceptions, all is good!
Sightseeing
Sightseeing around Taipei city and the suburbs were awesome. Sunset at 淡水渔人码头 was a magical moment for both of us, for it was our first sunset together in the 4 years together. Catching the city view of Taipei at night on top of Taipei 101 was spectacular, as we overlook the entire city at 89 storeys above ground. A glimpse of the first waterfall of my life – 十分大瀑布 and the short but sweet rainbow moment made the 1.5 hours of travelling by train all worthwhile. 故宫 and its exhibits were breathtaking, imagine jade in the shape of pork belly and lettuce, you would be amazed at the skills and expertise of the ancient people. Real-time history lessons conducted by Mister alongside our visits to 中正纪念堂 and 国父纪念館. New experiences, memories and knowledge – I have gained a lot from Taipei indeed!

大安森林公园

士林市场

Taipei 101

故宫

情人桥

情人们的愿望

Sunset at 淡水渔人码头

十分大瀑布

A glimpse of rainbow
Food
No trip without food is complete. Food was definitely another huge plus point for us. Breakfast was never an issue because 永合 was there for us. A hearty breakfast with 温豆浆 and 葱抓饼, it marks a good start to our day. ‘想好才点’ was the pet phrase of the shopowner and I always eagerly await to catch him say that every morning. Then it would be lunch stopovers at 鼎泰豐 or 高记 for some chinese food refuel to keep us going till the night. Alternatively, we would be at those themed restaurants for some different vibes. We tend to be really unhealthy for our dinner because I remembered we ate 豪大大鸡排 for 3 of the 5 nights and a hotpot/barbecue buffet on our last night. And I must comment that 炸牛奶 is one of the best street food I have eaten in Taipei. Soft yet crispy on the outside, bursting with milky flavour on every bite! BEST!
[鼎泰豐]
台北市忠孝东路三段300号
Awarded one Michelin star
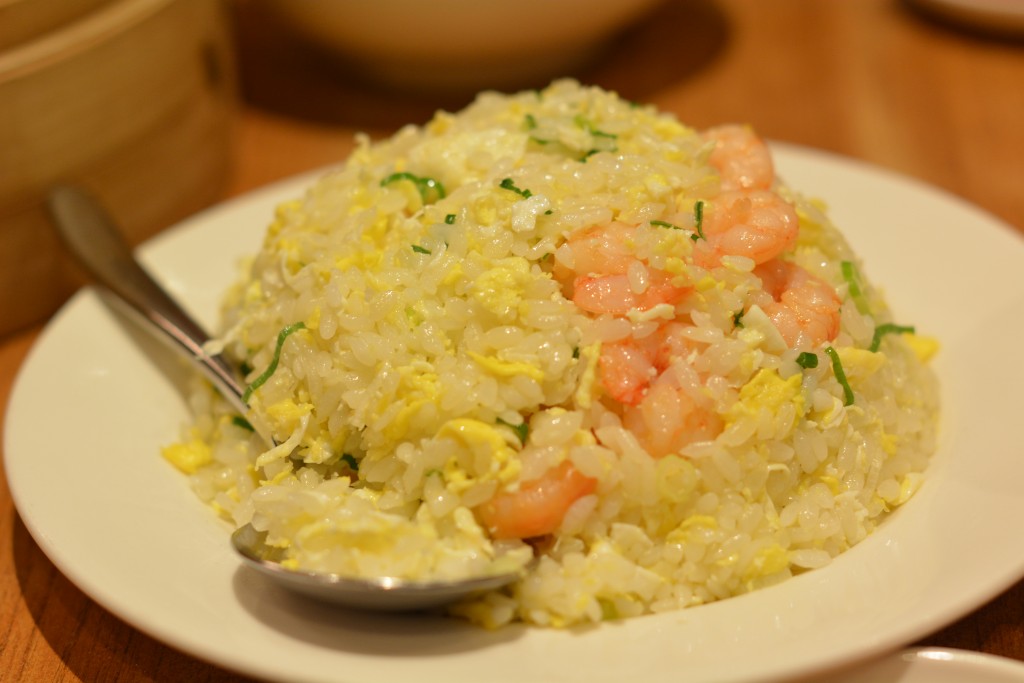
虾仁蛋炒饭
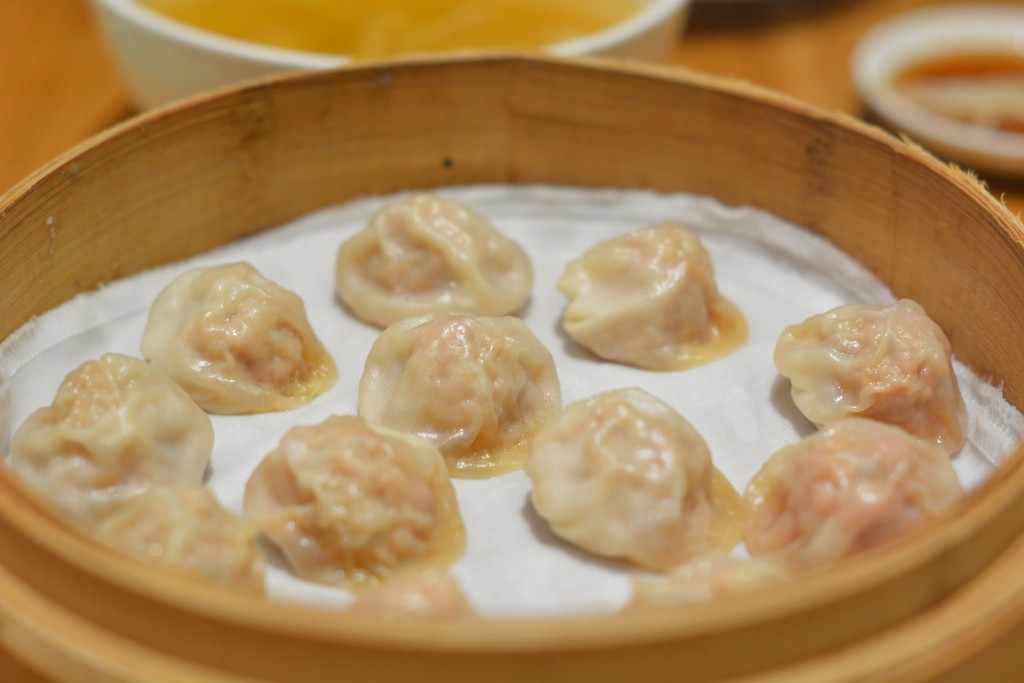
小笼汤包
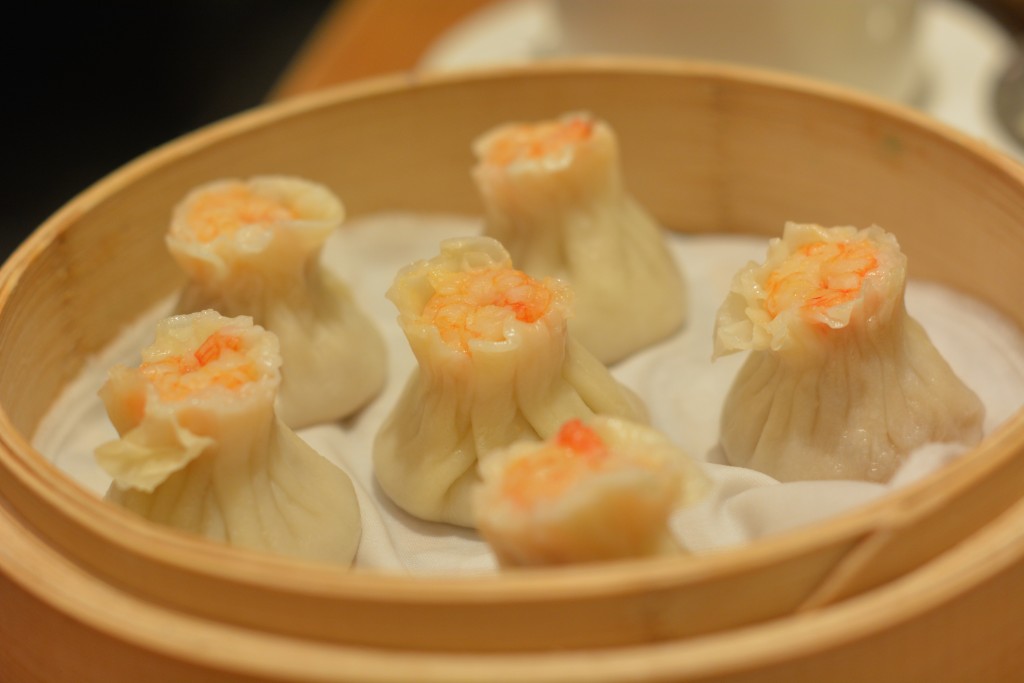
虾仁烧卖
[高记]
台北市復兴南路一段50号
Awesomely good food!
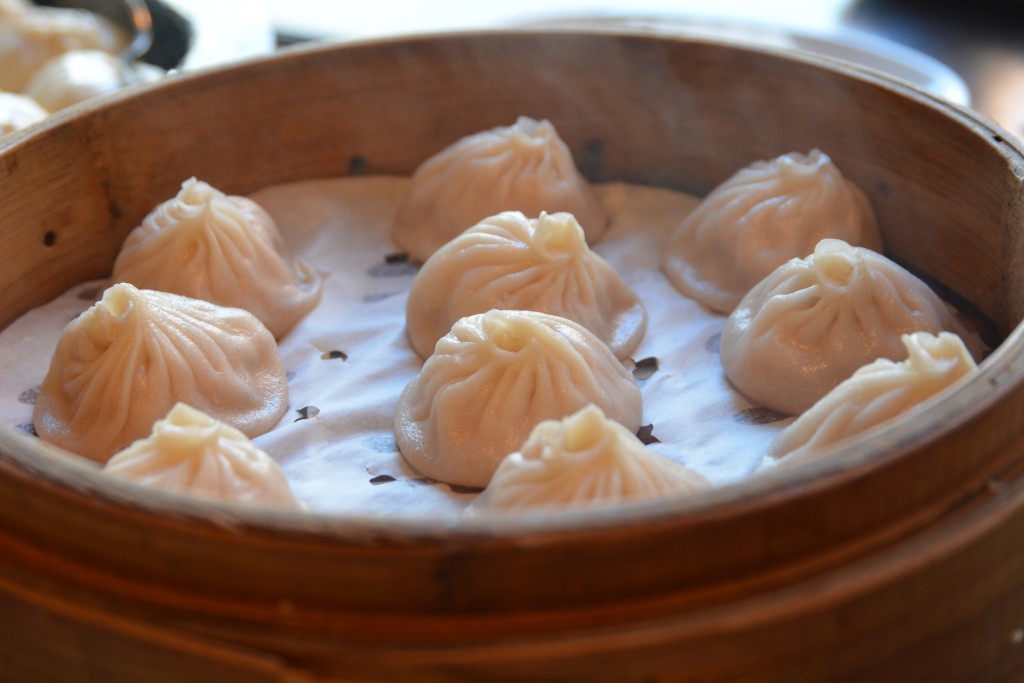
元笼小笼包
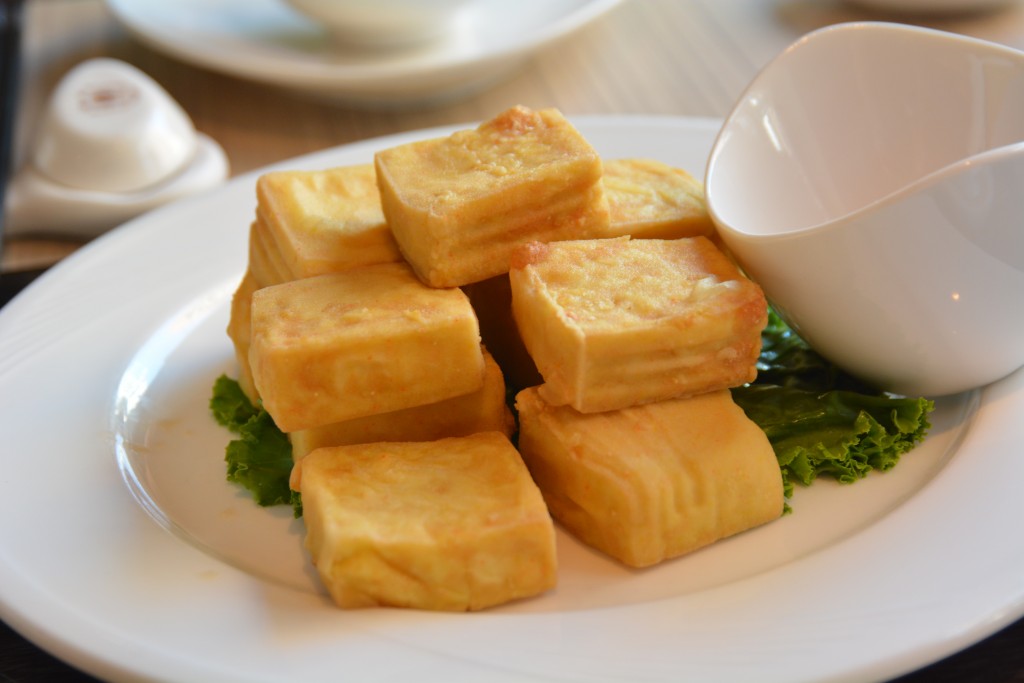
黄金嫩豆腐
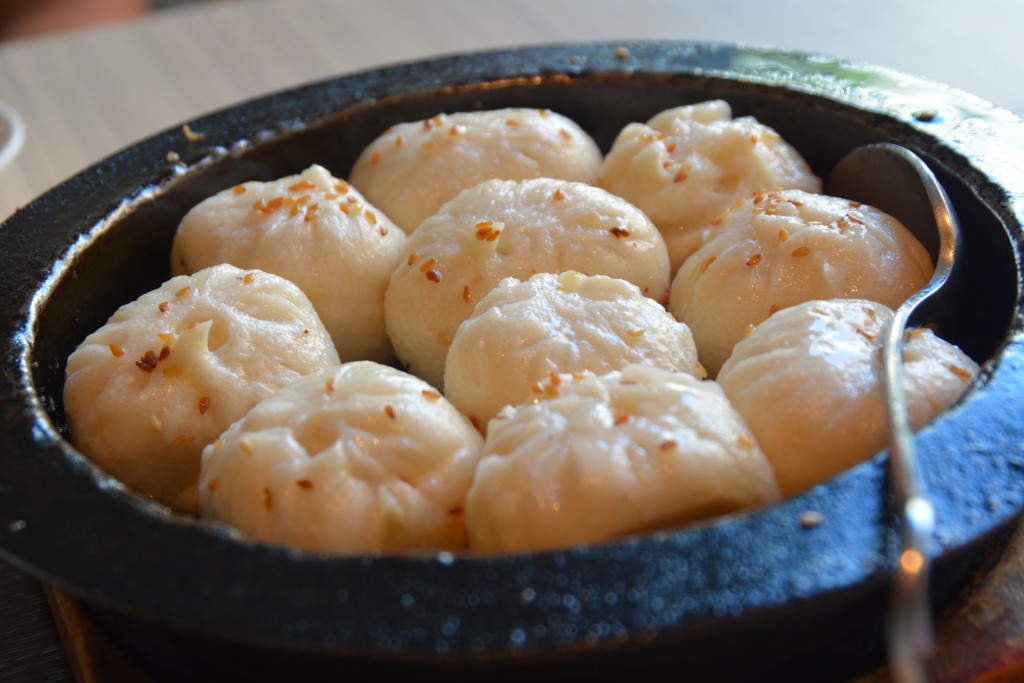
上海铁锅生煎包
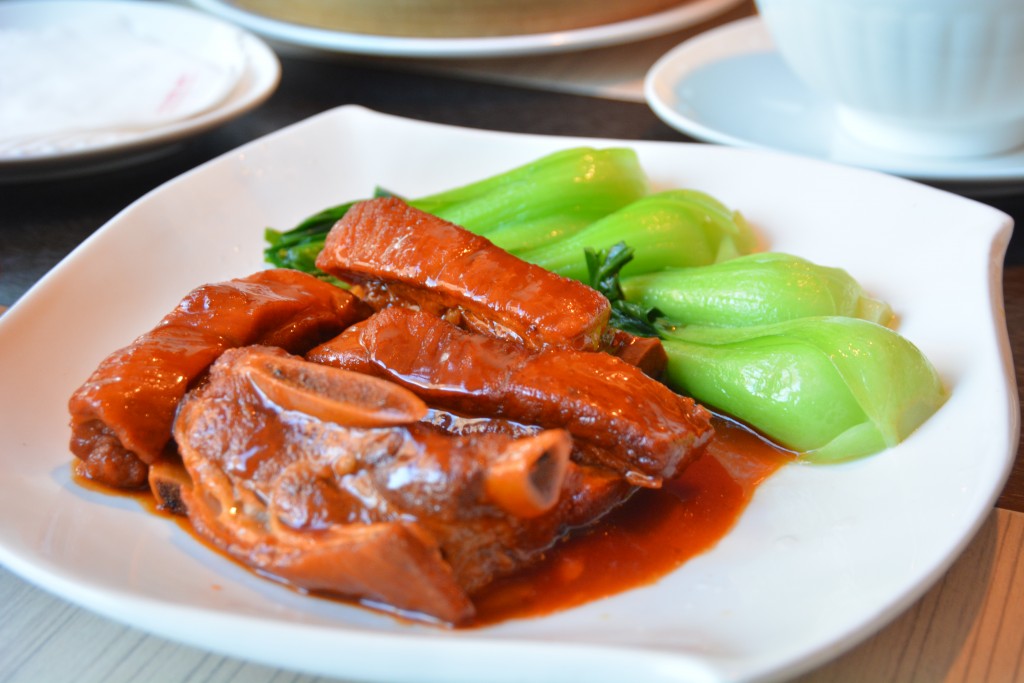
无锡焖子排
[Hello Kitty Kitchen & Dining]
台北市大安路一段90号
A must-go for kitty fans for the experience! Minimum spending of NT300 per pax

Kitty Cappuccino!
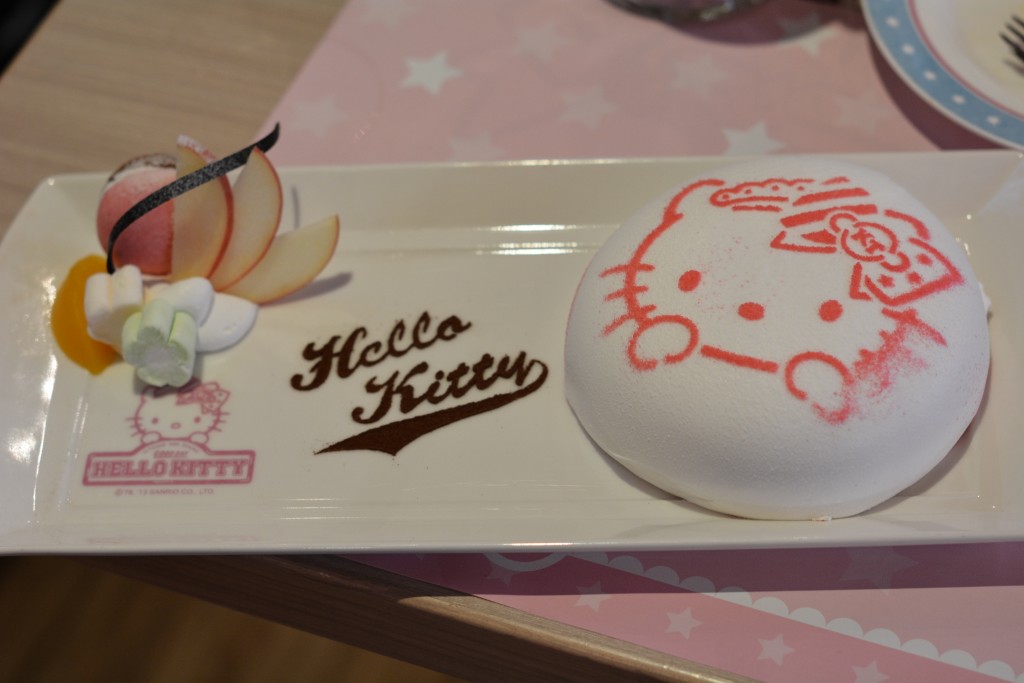
Boston Cream Pie
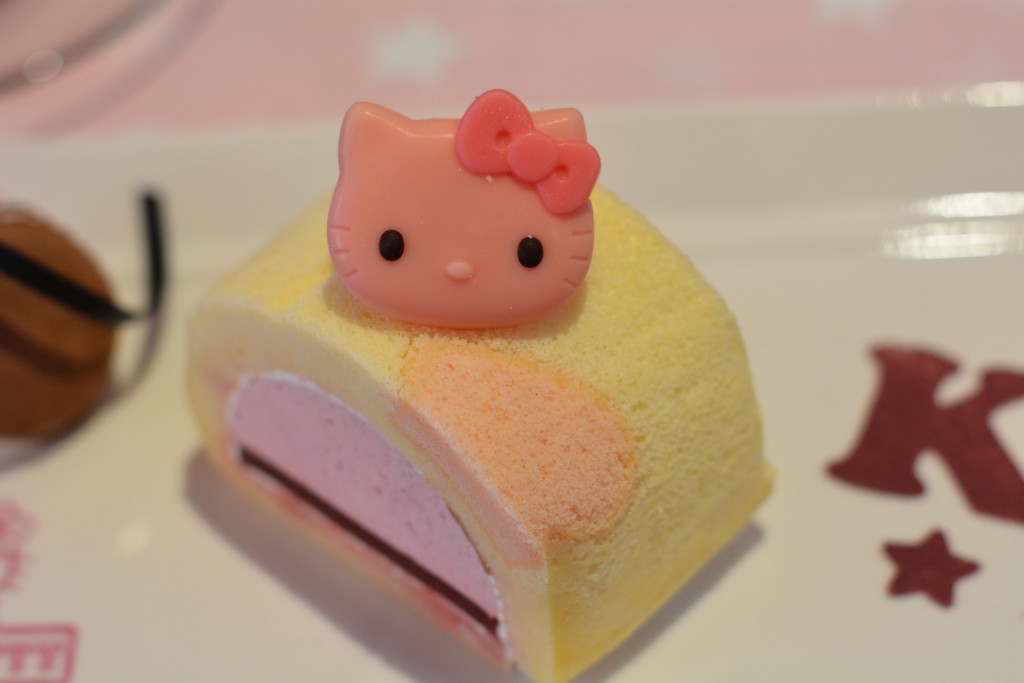
Vanilla Swiss Roll with Strawberry Mousse
[Barbie Cafe]
台北市忠孝东路四段128号2樓
A stone’s throw away from Hello Kitty Kitchen & Dining. Minimum spending of NT300 per pax too.

Barbie Cappuccino
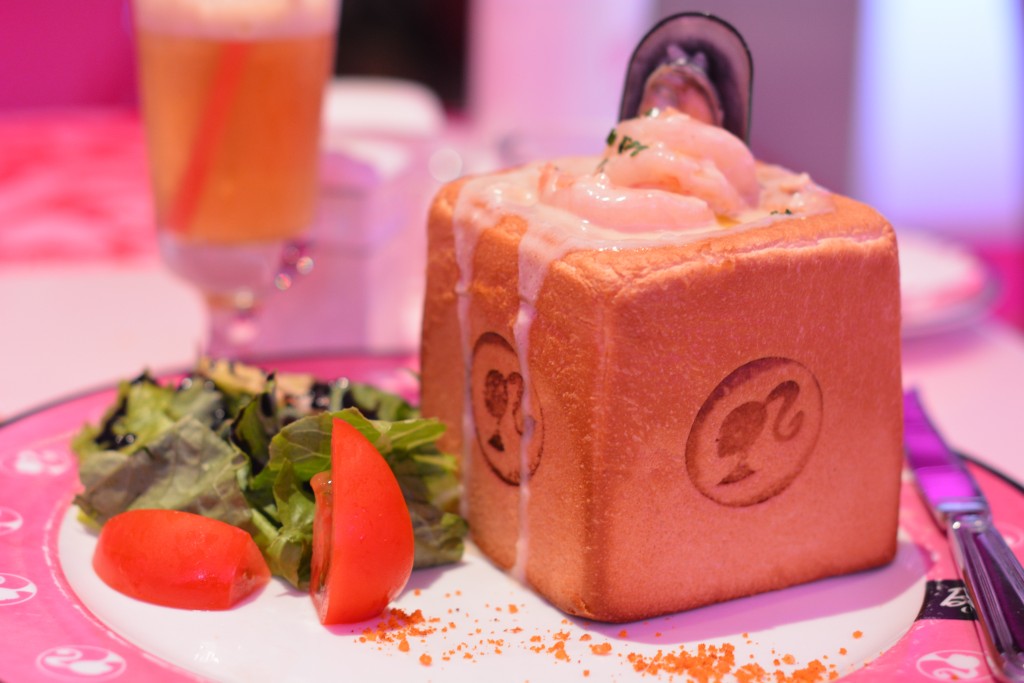
Seafood Toast Box
[Modern Toilet Restaurant]
台北市西宁南路50巷7号2楼
The interesting concept is the crowd-pleaser, more than the quality of the food.

This has got to be the biggest toilet bowl I have seen thus far
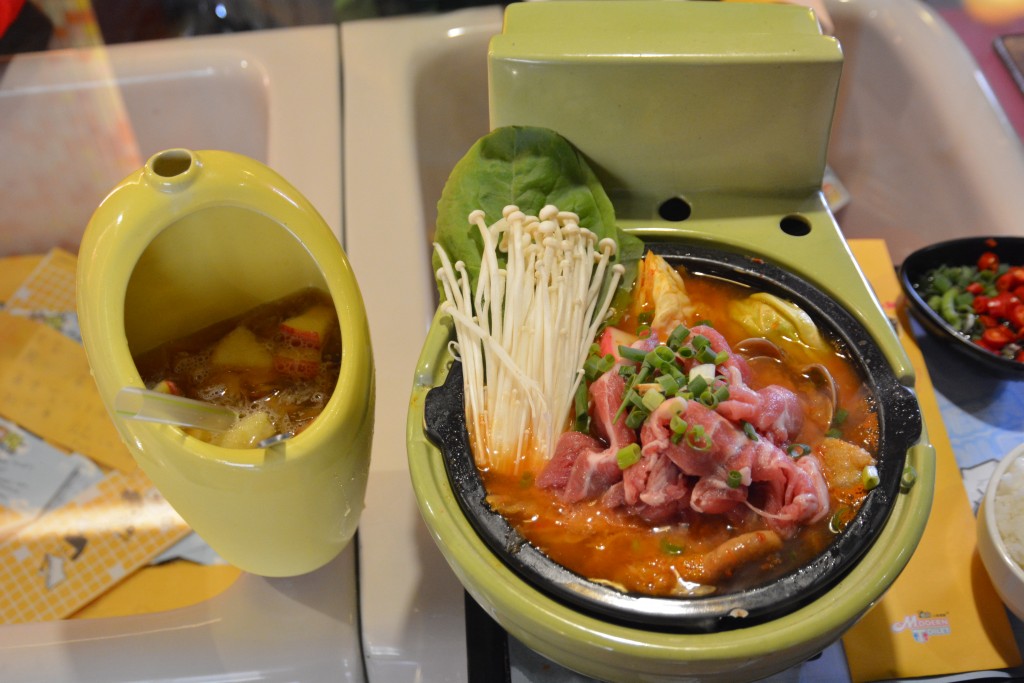
Food in the toilet bowl and drink in the urinal?!?
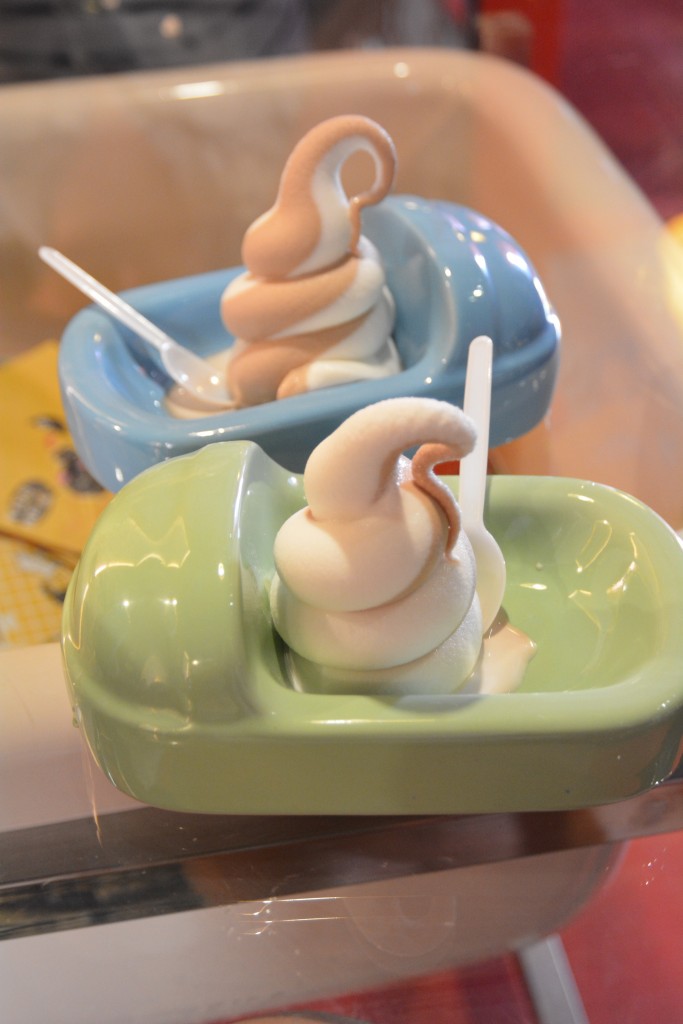
Poo ice cream!
6 days after returning from my trip, I absolutely miss Taipei and travelling with my best travel companion. What can be better than leaving behind all your worries in Singapore and jetting away on a plane? Perhaps hiding under the blanket is the next best alternative!

Miss those wacky moments in Taipei!
When I was young, I was too ignorant to notice that my grandma loves durian. It was only in the recent years that I realised this fact. After this discovery of mine, I attempted to make a durian mousse cake for one of her previous birthday, but it failed terribly. Thankfully, that was at the trial stage. And thankfully once again, bakeries and store-bought cakes are abundant in Singapore.
This year, I decided to re-attempt my previous, unfinished mission. I chanced upon the durian mousse recipe from Bake King’s “60th Anniversary Recipe Book” and thought it was worth giving a try. The instructions were relatively easy to follow, and it was just finger-crossing on the outcome. No trial run this year, just one try, and it was either make it or break it. Luckily, the durian mousse tasted pleasantly enough to be served and I didn’t have to resort to my backup plan to grab a store-bought cake for the birthday dinner.
I threw cubes of sponge cake on top of the naked, frosted cake to add some dimensions to it in the absence of piping. I like the pale yellow colour of the durian mousse, not too eye-catching but not that pale either. The durian mousse is great, but could be smoother. The sponge cake base has improved (versus the hard cake for my Hello Kitty birthday cake after 12 hours in the fridge) but could be softer. Nonetheless, it’s still a lovemade durian mousse cake. First cake from me to my grandma, and definitely not the last.
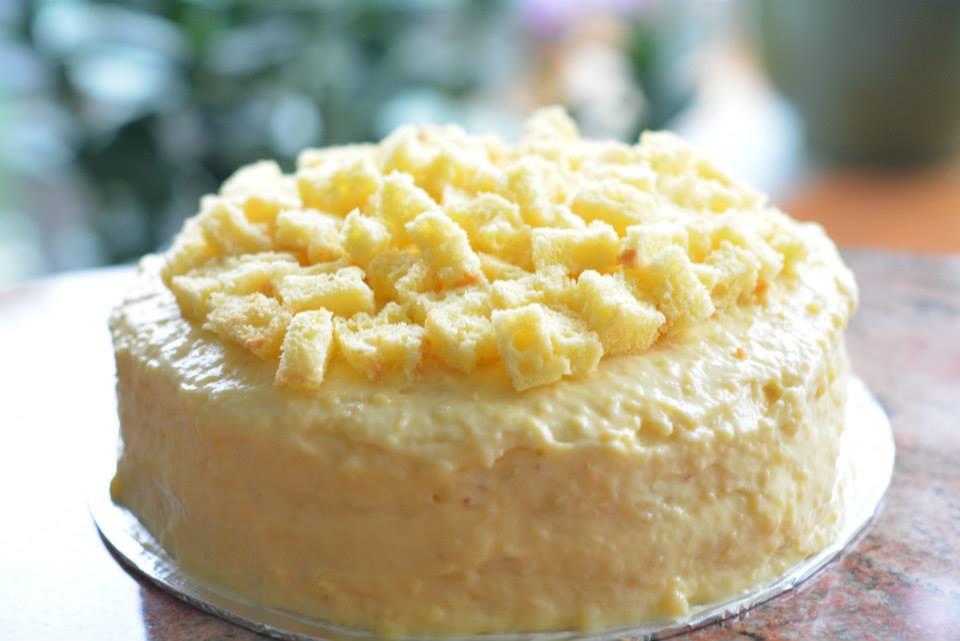
100% durian goodness!
But I can’t wait to give Okashi’s genoise sponge cake recipe a try sometime soon. I need to hunt for a sponge cake recipe that stays soft even after 12 hours in the fridge. December, it shall be!
P.S. If you do realise, I have created a new category “Lovemade” amongst the existing categories I already have. This new category shall feature all the specially-made gifts (not limited to food) to my loved ones for occasions and celebrations. Being handmade is a given, and lovemade is the key!
I am submitting this post to Aspiring Bakers #36: Choc-a-cookie (October 2013) hosted by Genie of Honeybee916food.
I confess that I find it difficult to bake a good batch of cookies. It seems like I’m underbaking my cookies most of the time. And hey I’m baking for at least 18 minutes and that kind of duration is considered to be on the long side for cookies so I am often left puzzled at the end result I achieved. I usually have more luck with drop cookies and they are easier to handle. I drop a heap of the cookie dough on the baking sheets and cross my fingers and hope for the best. But for cutout cookies, they are a little trickier. The dough has to be chilled, then rolled then cut into the desired shapes. More work no doubt, but that’s how all the fanciful cookies come into existence complete with royal icing.
But today, it’s not about drop cookies nor is it about cutout cookies. Yes, we are working with chilled cookie dough but no cookie cutters required. Just some artsy talent and a tiny weeny bit of perseverance to complete the assembling process.
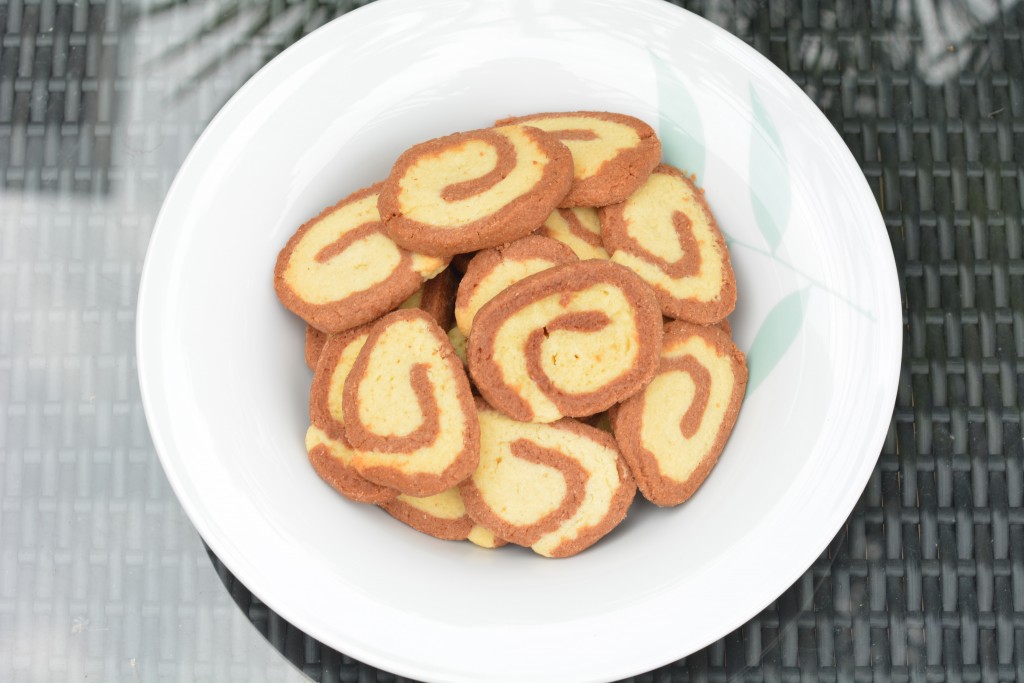
The best of 2 flavours – all in one bite!
Chocolate, vanilla, rolled together. Yes, that’s what this cookie is essentially about.
Choc-Vanilla Spiral Cookies
Recipe adapted from Women’s Weekly’s “Chocolate”
Butter 200g
Caster sugar 150g
Vanilla extract 1 tsp
Egg 1
Plain flour 375g
Cocoa powder 1 tbsp
1. Beat butter, sugar, vanilla extract and egg with electric mixer until light and fluffy.
2. Divide mixture between two medium bowls. Stir half the sifted flour into one bowl, mix to form a firm dough.
3. Stir remaining sifted flour and cocoa powder into the second bowl, mix to form a firm dough.
4. Refrigerate both vanilla and chocolate dough for 45 mins.
5. Roll vanilla dough and chocolate dough separately into rectangular shape.
6. Turn vanilla dough onto chocolate dough and roll dough stack tightly.
7. Refrigerate the dough stack for 30 mins.
8. Cut the dough stack into 1 cm slices.
9. Bake for about 18 minutes at 180℃.
Pandan chiffon cake – it never goes out of style. The donut craze has come and gone. The popularity of cupcake is slowing down. And here we have, a cake that has no icing, no sprinkles, but just plain green in colour. Yet this ordinary-looking cake has withstood the test of time and is still very much in style. I have heard stories of how tourists will snap up boxes of this legendary cake before boarding their flights. And it is no surprise that there is a Bengawan Solo outlet at Changi Airport Terminal 3.
Given its strong heritage in Singapore, you can easily find them in almost any mainstream bakeries, of course unless they are sold out. And now, they can be found in supermarkets as well. That just show how much Singaporeans love this cake.
I baked a pandan chiffon cake on a Sunday in my new 21cm chiffon pan. It was a scaled-up version of a recipe that I have tried successfully for many times. But due to the misjudgment in the baking time required, the cake collapsed and I was utterly depressed. I only recovered when my 2nd attempt was a success! And now I know, 55 minutes is the key.
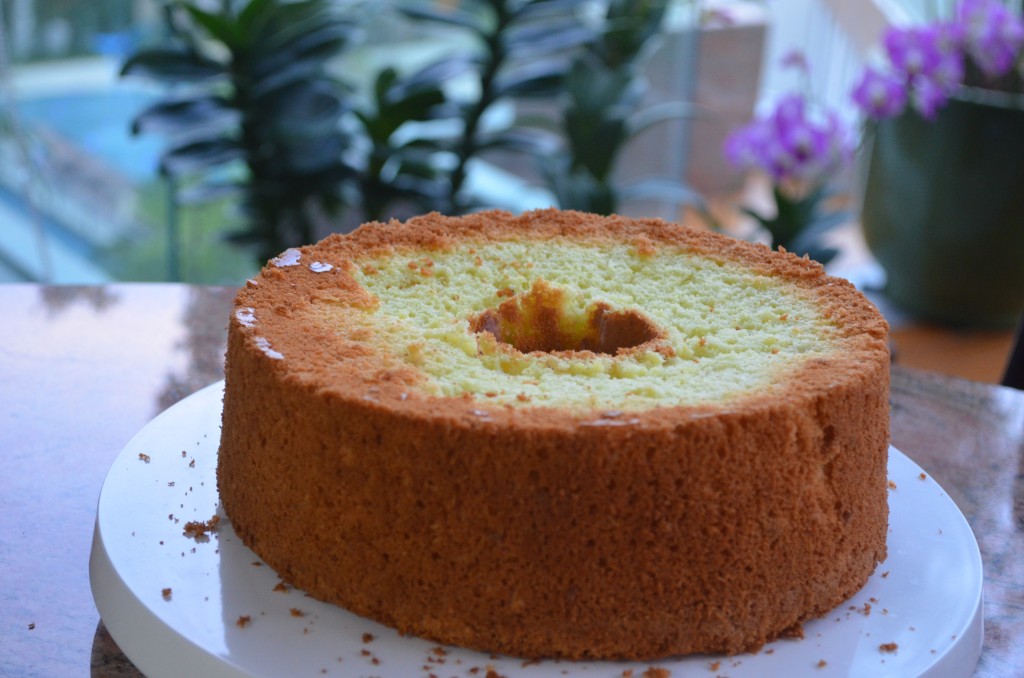
Standing proud and tall!
Pandan Chiffon Cake
This recipe (16cm version) is submitted and featured in Ascendas Calender 2013 (month of November). Credits to Mister for the submission of recipe.
Ingredient A
Cake flour 80g
Egg yolks 5
Caster sugar 20g
Olive oil 40g
Fresh milk 40g
Coconut cream 40g
Condensed milk 40g
Pandan extract 1/2 tsp
Pandan paste 1/8 tsp
Ingredient B
Caster sugar 90g
Cornflour 10g
Egg whites 5
1. Preheat the oven at 180℃.
2. For Ingredients A, comine egg yollks and caster sugar into a mixing bowl. Mix till well-combined.
3. Add olive oil, fresh milk, coconut cream, condensed milk and pandan extract/paste into the egg yolk mixture. Stir to combine.
4. Fold in cake flour til well-mixed. Leave the flour mixture aside to stand.
5. For Ingredients B, beat egg whites, caster sugar and cornflour together until stiff peak stage for the meringue mixture.
6. Take about 1/3 of the meringue mixture and fold in gently into the flour mixture till well-combined. Repeat this step for the remaining 2/3 of the meringue mixture.
7. Tap the batter gently on the table top to remove air bubbles before pouring into the 21cm chiffon pan. Once poured in, tap the chiffon pan gently again on the table top to remove air bubbles before putting into the oven to bake.
8. Bake at 180℃ for 55 minutes, or until a skewer inserted comes out clean.
The hardest part of baking this cake is definitely judging whether you have attained the stiff peak stage. What I always do is to turn my mixing bowl over to make sure the meringue doesn’t fall off the bowl. If it doesn’t, then I can be pretty sure I have reached the stage.
I just had an internal debate with myself. And the debate was on whether it should be brownie or brownies? I will say “I made brownies!” instead of “I made brownie!”, but brownie is singular. I feel like I need to obey the rule of English… but I decided in the end to pay tribute to the Women’s Weekly recipe that I adapted from.
In fact, I baked these brownies at the start of the month as a welcome treat for my sister’s friends from Japan and as a complementary dish for our ice-cream supper. I tried a tiny slice myself and it was moist and chocolatey, like how brownies are supposed to be like. In my opinion, I like it better than the Betty Crocker’s mix actually. But I may be biased, given my past experiences with mixes, brownies or not. But do give it a try and come up with your own verdict!
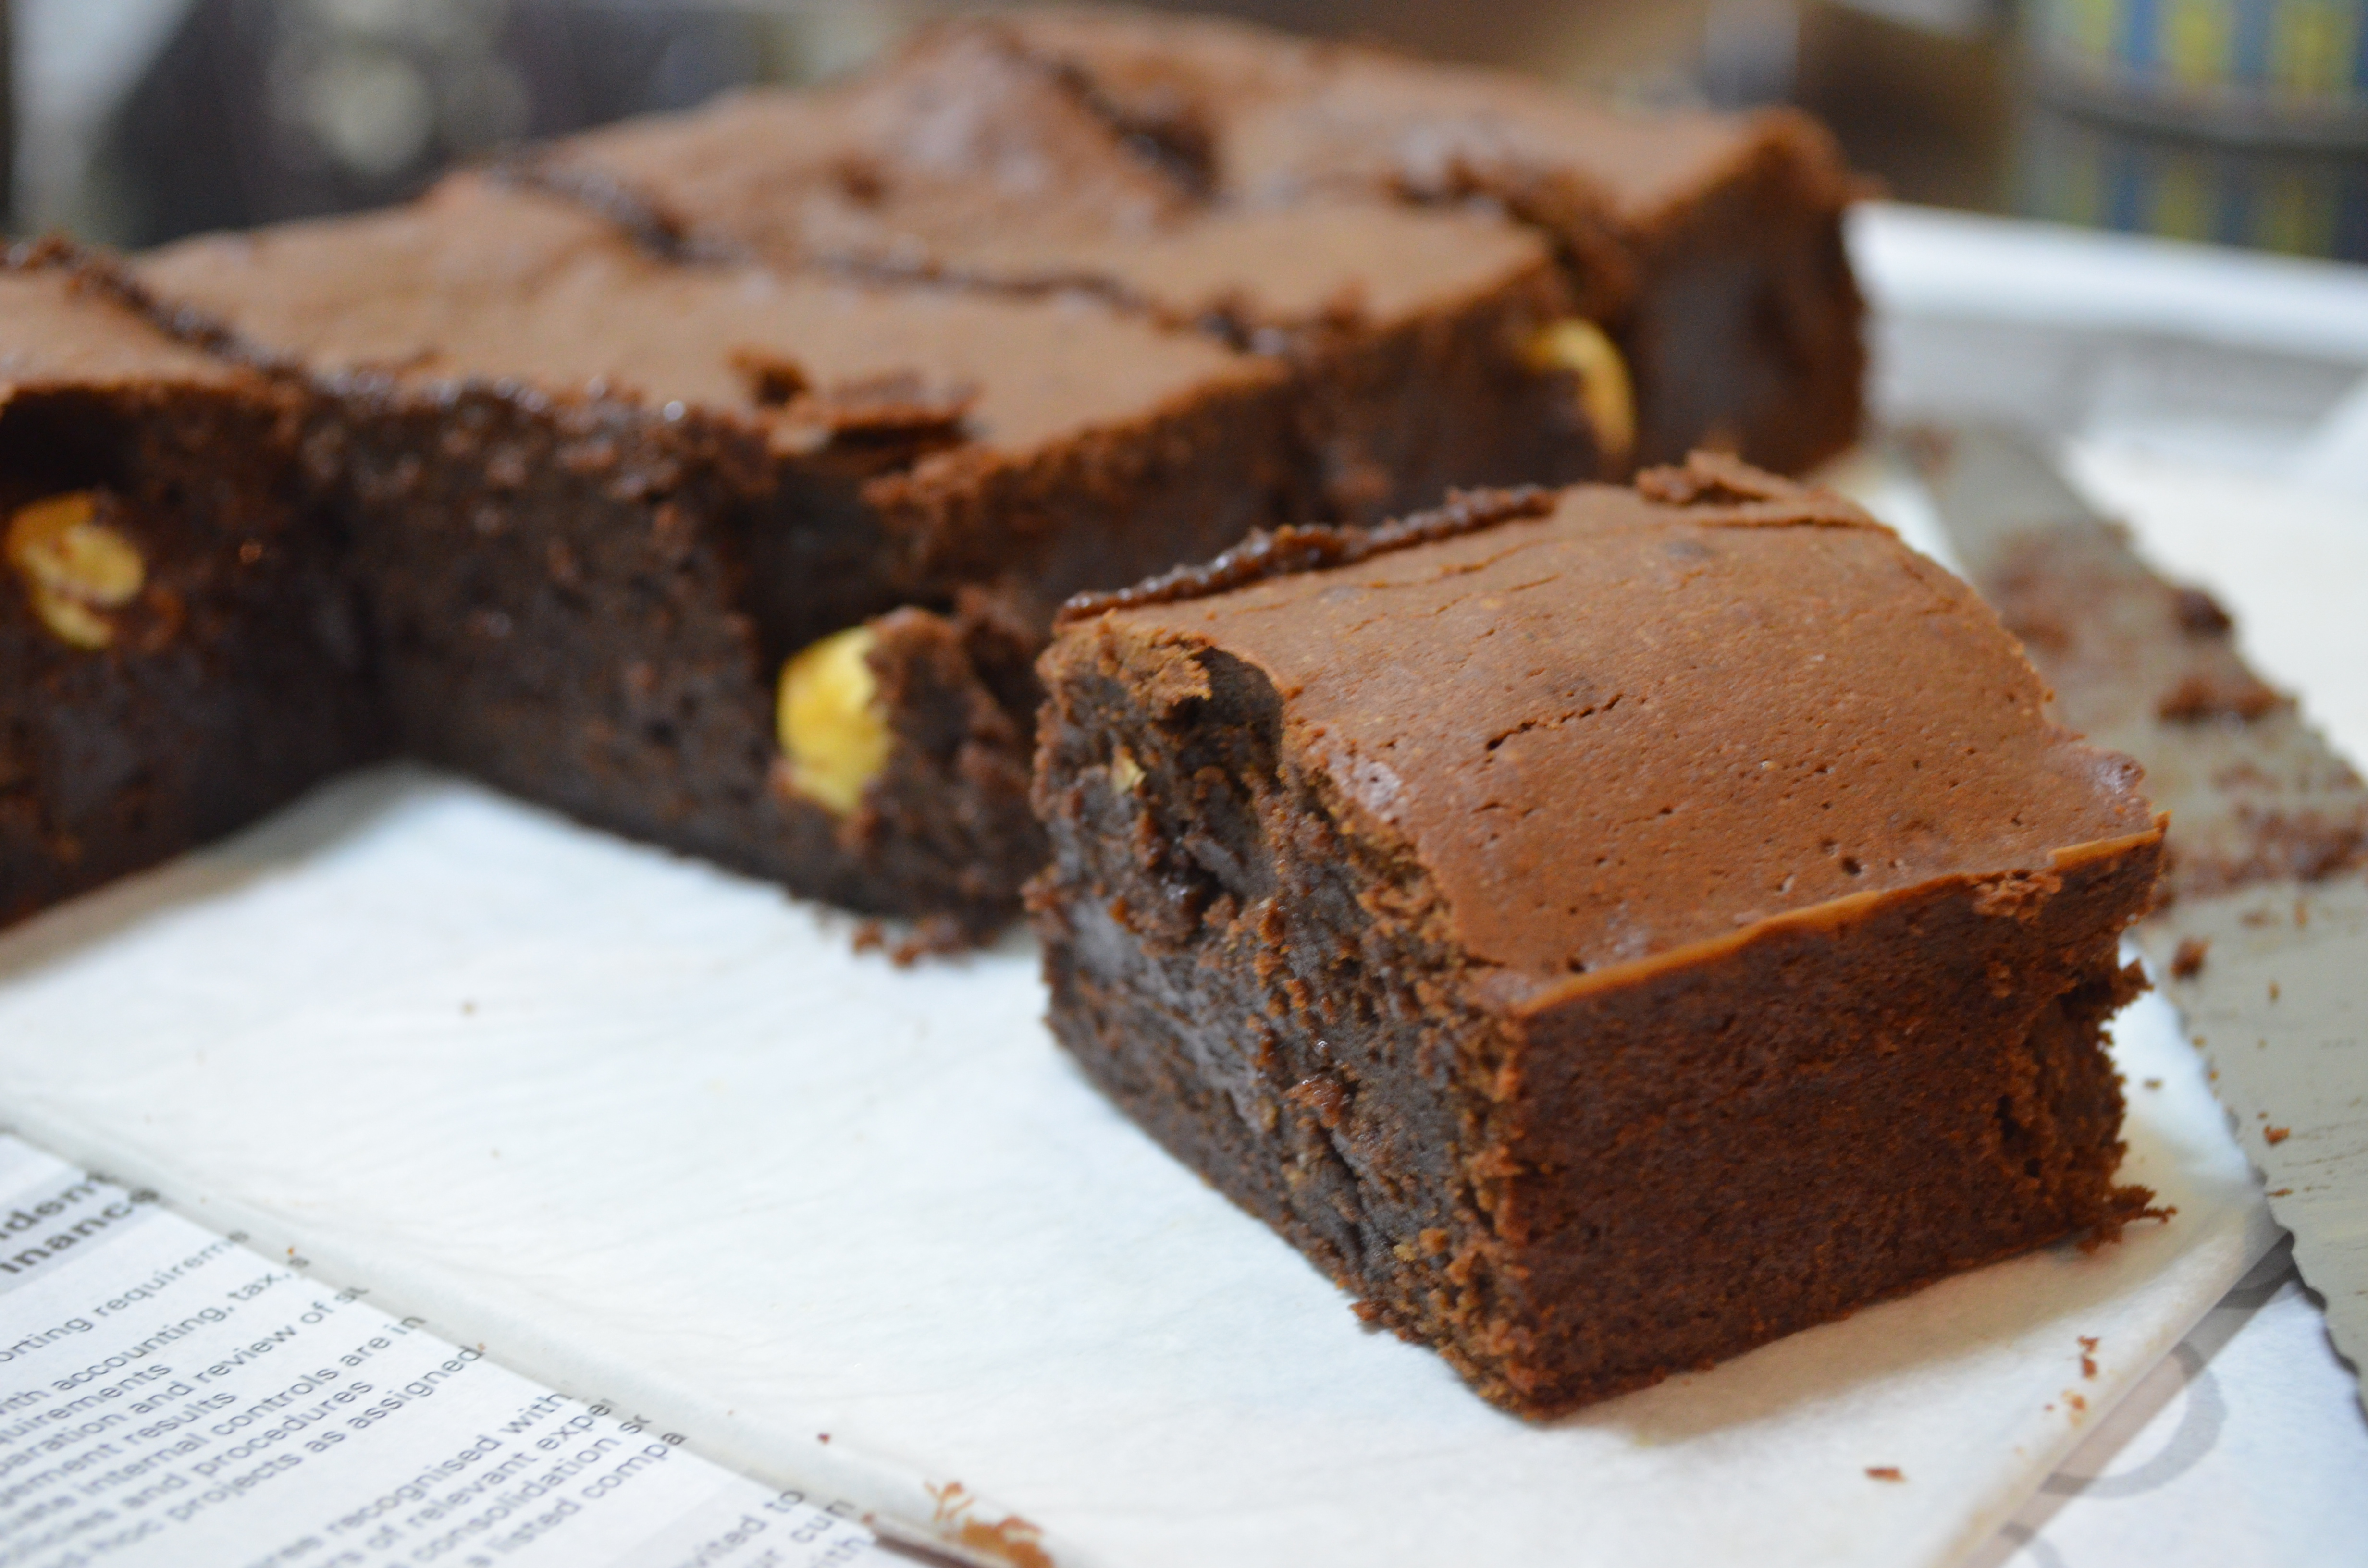
Chocolate Brownies with Hazelnuts
Chocolate Brownies with Hazelnuts
Recipe adapted from Women’s Weekly’s “Chocolate”
Butter 150g
Baking chocolate 260g
Brown sugar 330g
Eggs 4, beaten slightly
Plain flour 150g
Sour cream 120g
Hazelnuts 50g
1. Preheat oven to 180℃. Line 8″ x 8″ square pan with baking paper.
2. Stir butter and chocolate in medium saucepan over low heat until chocolate is just melted. Transfer mixture to medium bowl to cool slightly.
3. Add sugar and eggs, then sifted flour, sour cream and nuts. Spread mixture into baking pan.
4. Bake for about 30 minutes at 180℃.
This recipe is easy to handle, and almost as fuss-free as using a brownie mix. And most importantly, you get goody chocolatey brownies at the end of the day!
Extremely tired but highly satisfying! That is exactly what I felt after a week of mooncake-making. But with 100 mooncakes, big and small, traditional and snowskin, I feel great to end off Project Mooncakes 2013 on a good note. Many thanks to the encouraging comments and positive feedback from my cornerstone investors, they made the late nights put up all worthwhile.
This 2013, I achieved satisfactory results for the traditional mooncakes with a new recipe attempted. This 2013, I tried to customize various editions of mooncakes for different recipients. This 2013, I finally attempted to publicise ‘Miss Bakerholic’ a little more with the creation of my personalised stamp and stickers. And most importantly, this 2013, I found the best spokesperson for Miss Bakerholic!
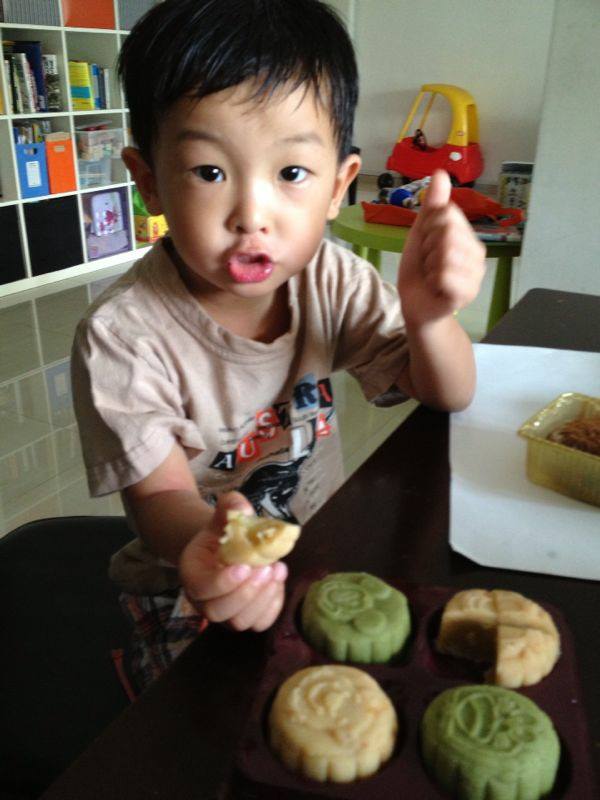
Denver, my spokesperon for Miss Bakerholic (Photo credits to Ivy)
Honestly, I am more fond of traditional mooncakes. More time-consuming, more laborious no doubt. But with their golden-brown skin shade and chinese character imprints, they are a sheer beauty to stare at. And they are exactly the reason why I fell in love with mooncake-making 5 years ago. Traditional mooncakes go hand in hand with those classic, heavy wooden moulds. Press it well and hit it hard, and a beautiful mooncake is in sight!
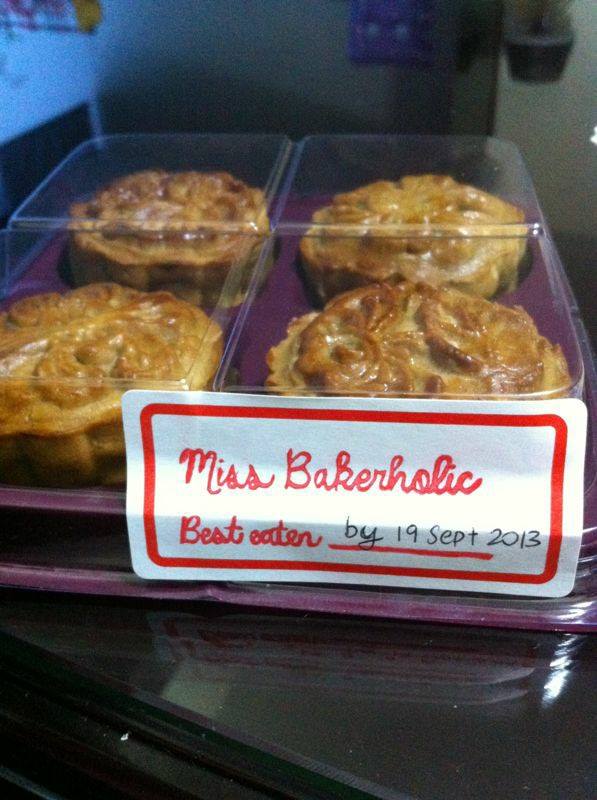
My personalised stickers!
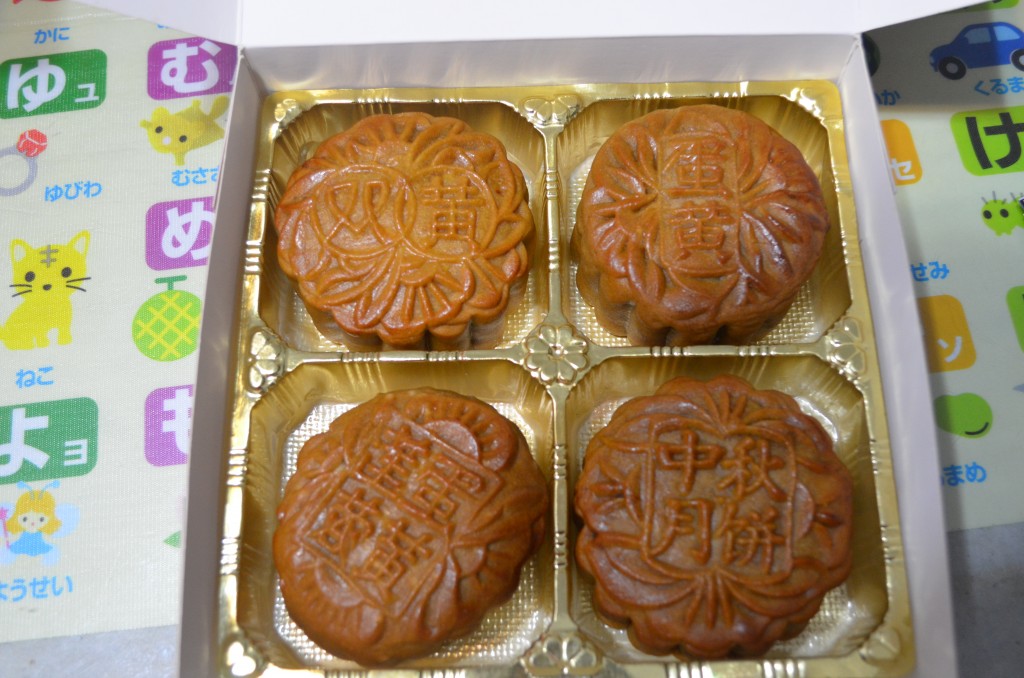
Mix-and-match traditional mooncakes
But I also like snowskin mooncakes because I can play around with the colours and flavours of the snowskin dough. Green tea snowskin is a regular feature among my snowskin mooncakes because I am a huge fan of green tea, and so are my extended family members. Every year, I will wrap green tea snowskin mooncake with egg yolk for my Godfather because he enjoys green tea and salted egg yolks a lot. Last year, there were only white and green snowskin. But this year, I was more daring with colours and flavours – there’s white, green, orange and pink skins and 6 different types of pastes! And that’s how I managed to get my colourful 2013 edition snowskin mooncakes.
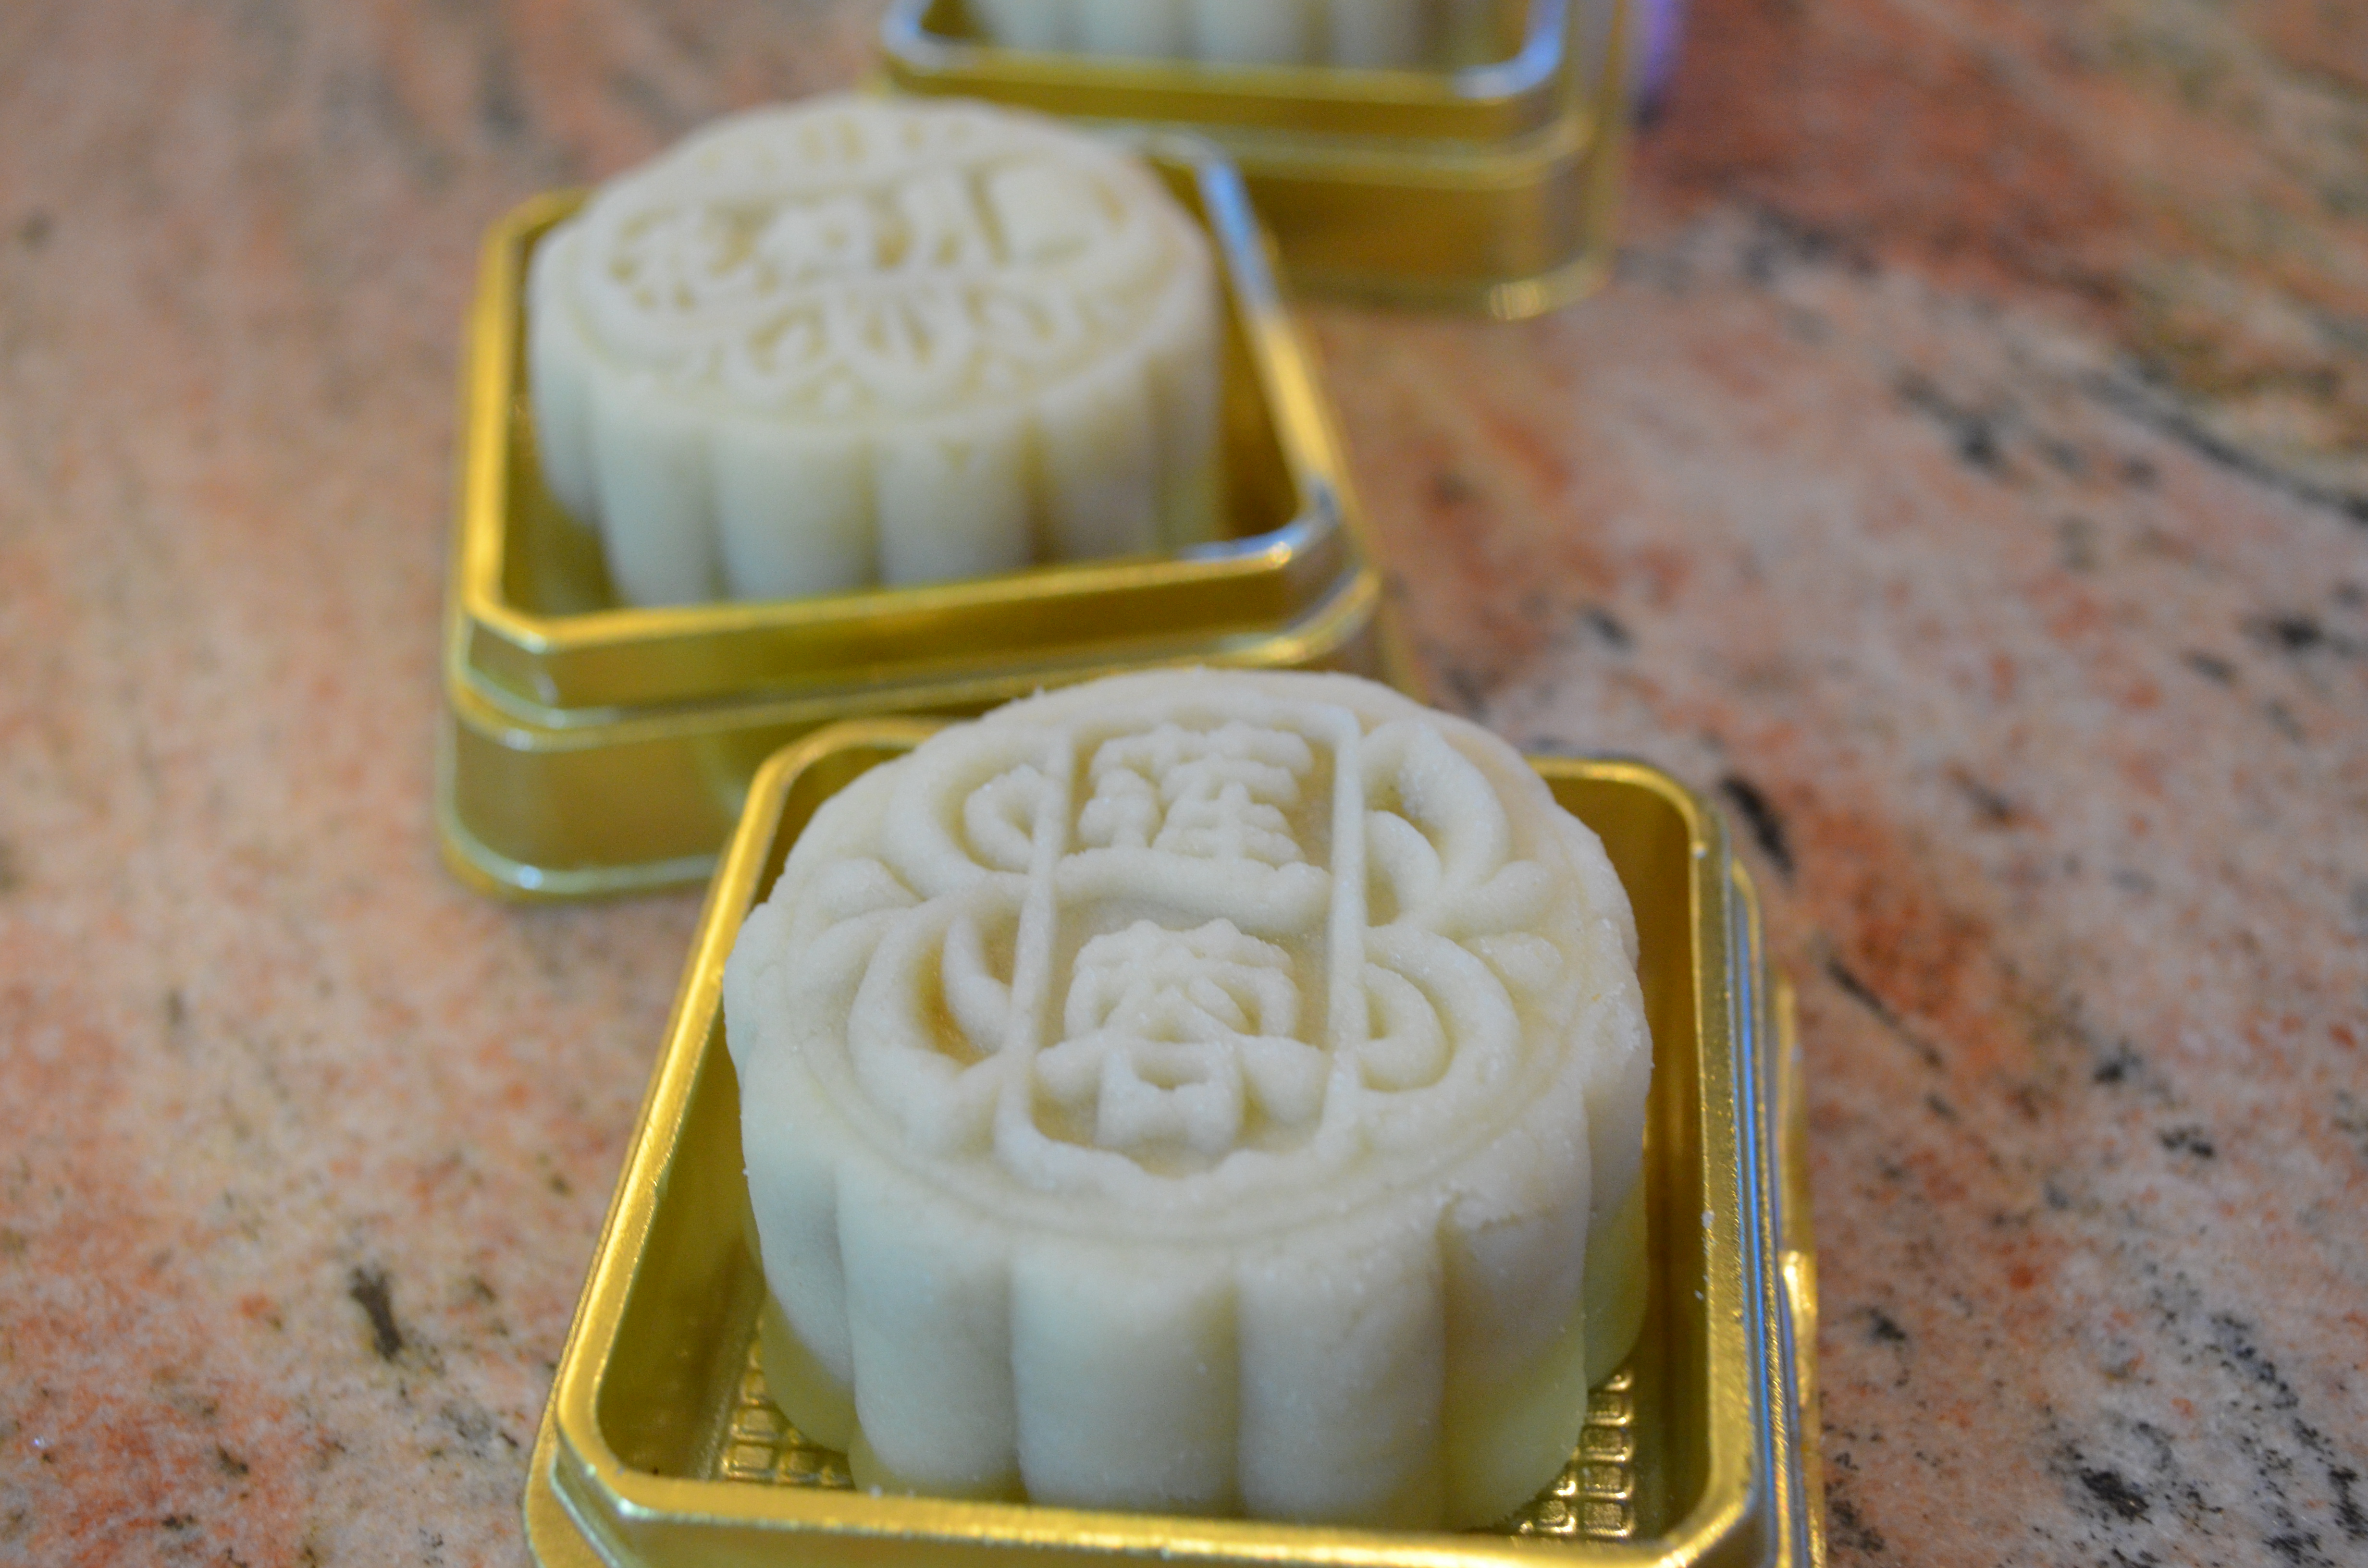
莲蓉 snowskin mooncake
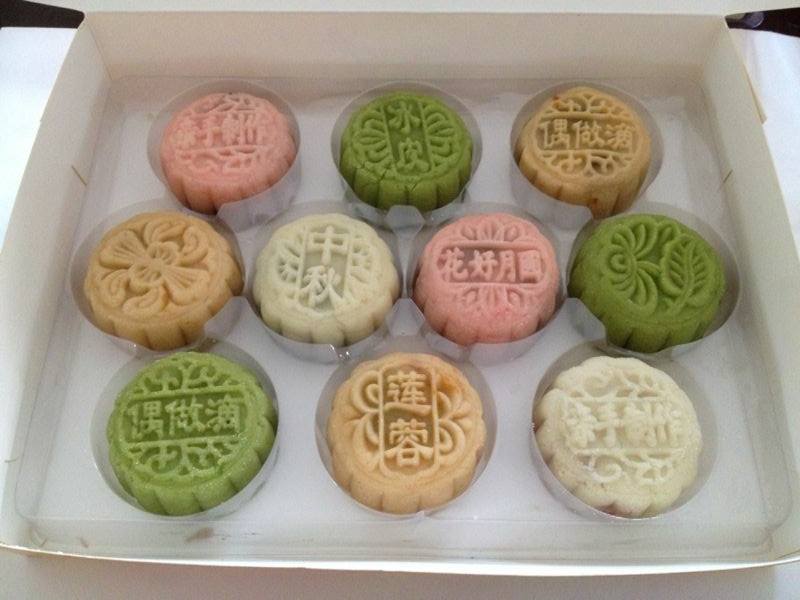
2013 edition (Photo credits to Ivy)
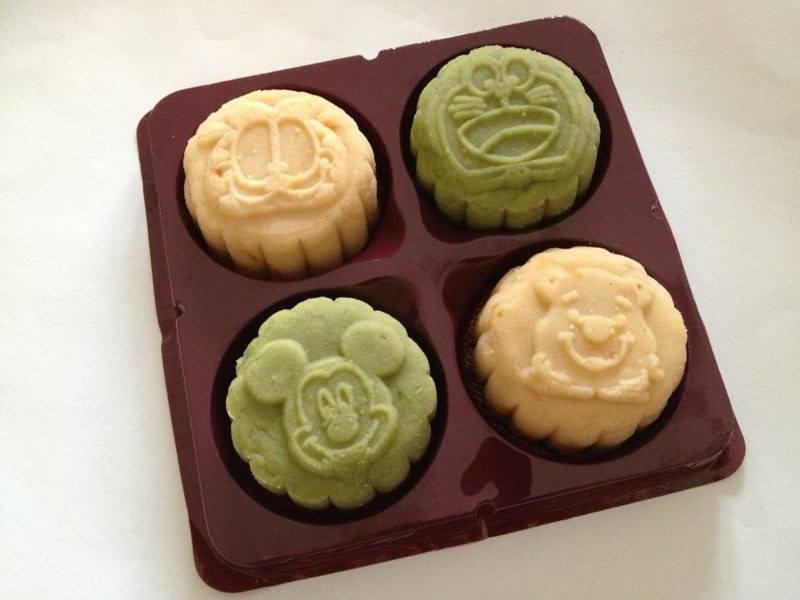
2013 kids edition (Photo credits to Ivy)
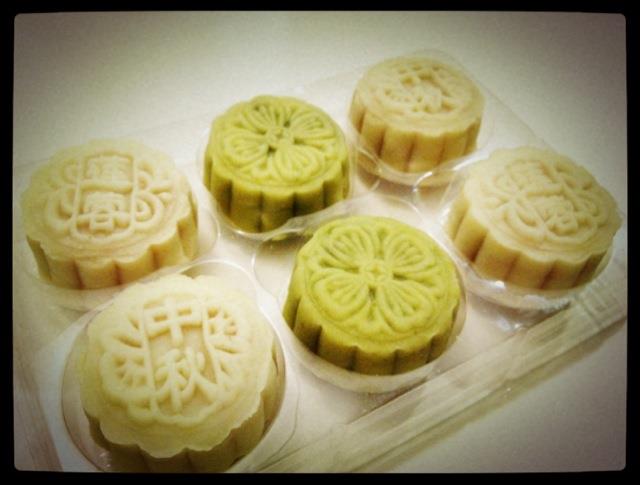
2012 edition (Photo credits to Nina)
Every year that I bake mooncakes, I feel a sense of gratitude to my Mummy, for going to practically every Phoon Huat store and baking shops all over Singapore with me and of course, sponsoring my box of wooden moulds 5 years ago (I was still a poor student then!). Not cheap I must say, my collection easily cost hundreds of dollars considering the number of moulds I currently have. So a big shoutout here: Thank you Mummy!<3 She’s not a big fan of mooncakes, but she never complains whenever I mess up her kitchen with stacks of wooden moulds left to dry on the kitchen top.
And tomorrow, I shall dig out my Hello Kitty lantern, head up to my rooftop, find the moon and happily eat my mooncakes. Happy Mid-Autumn Festival!:)
I am submitting this post to Aspiring Bakers #35: A Palate for Pizza (September 2013) hosted by Joey of Little Accidents in the Kitchen.
Why B.M.S.T? Wells the inspiration come from the B.E.L.T sandwiches that I saw at the OUE link bridge when I had to walk that bridge every Monday to Friday in the past. But not now anymore. It took me a while to figure out that B.E.L.T stands for Bacon, Egg, Lettuce and Tomato. So in my case, B.M.S.T pizza stands for Bacon, Mushrooms, Sausage and Tomato. Or it can also mean Baking Madness Super Tuesday Pizza!
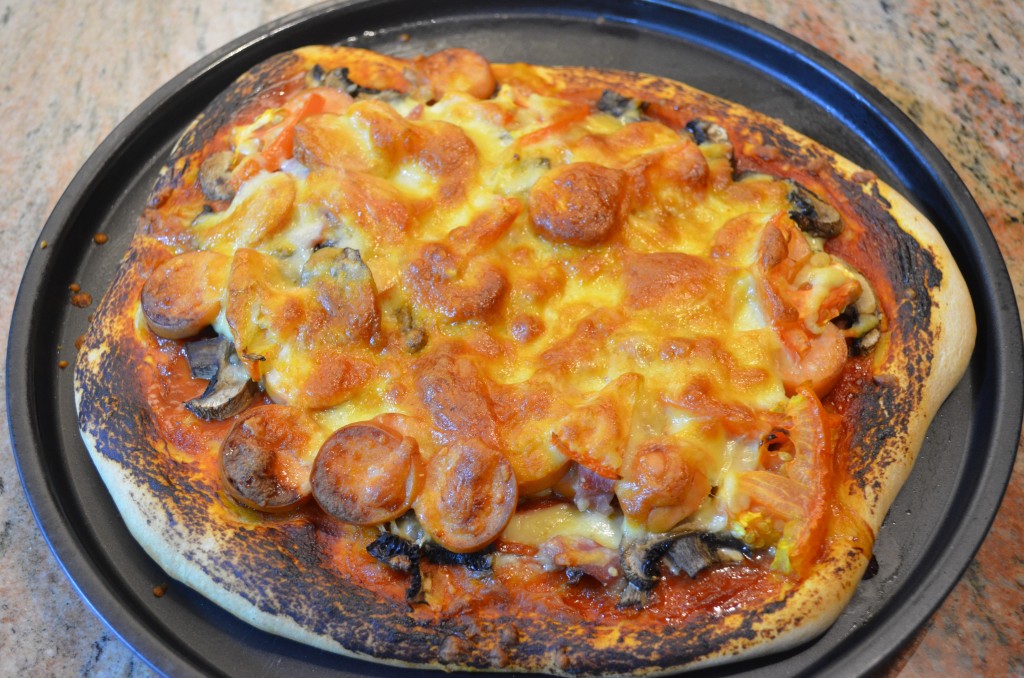
B.M.S.T Pizza

Closeup of the ingredients
Making your own pizza dough from scratch is time-consuming, but highly satisfying! To roll out the pizza crust from the elastic dough is laborious because the rolled crust will always shrink. It took me many minutes and lots of arm power to get my pizza crust into its odd shape, never mind that it’s not round in shape. Spread the tomato paste, lay the toppings and sprinkle the cheese. Pop it into the oven and there you have a pizza. And so it’s dinner time for Mister and I!
Thanks Mister for encouraging me to make pizza tonight!
B.M.S.T Pizza
Pizza Dough
Water 1 cup
Cooking oil 1 tbsp
Bread flour 2.5 cups
Caster sugar 1 tbsp
Salt 0.5 tsp
Instant yeast 1 tsp
Spread/Toppings
Tomato paste 0.5 can
Mini portobello mushrooms 4
XL tomato 1
Bockwurst sausage 1
Back bacon 1
Pizza plus cheese mix 125g
1. Mix all ingredients for pizza dough into the bread machine.
2. When dough is ready, remove it from baking pan.
3. With lightly floured hands, shape dough into a ball.
4. Roll the dough into greased 8-inch pizza pan.
5. Brush crust with oil. Cover and let it stand for 15 minutes.
6. Spoon tomato paste over dough, cover with toppings and lastly, top with cheese.
7. Bake for about 30 minutes at 180℃.
Never once thought that I would one day venture into the realm of ice cream making, but I did. Thanks to this! Saw this hand-held ice cream maker at Tokyu Hands selling at JPY1,580 which is equivalent to approximately SGD20.
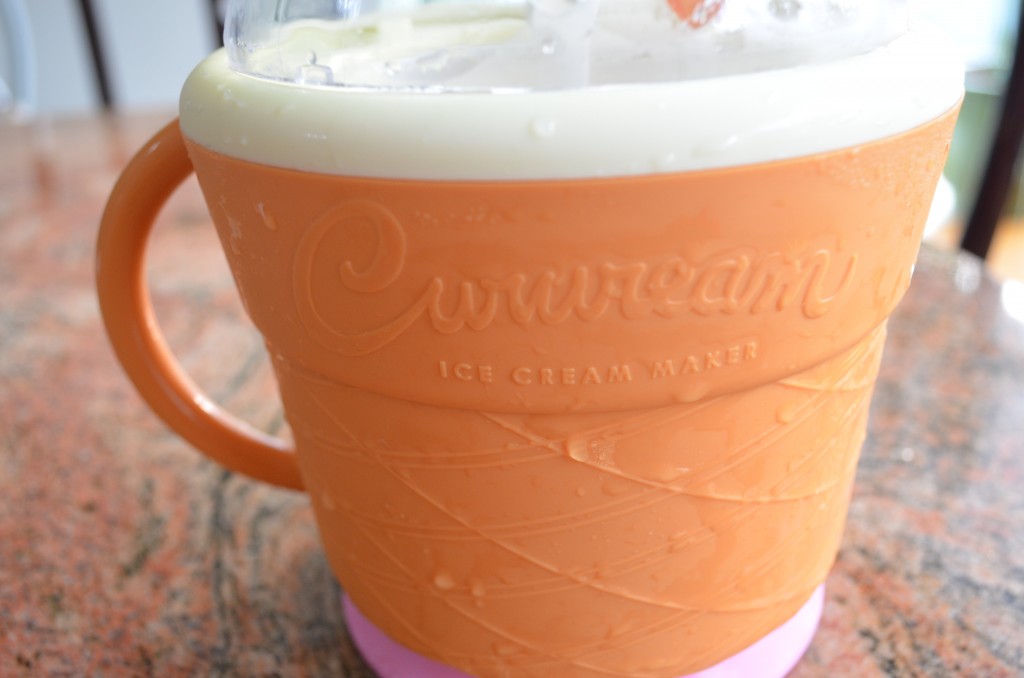
The exterior resembles a cone
For me, that’s the price that I am willing to pay to experiment. There are actually electric ice-cream makers selling at approximately SGD40 and above in Singapore but I have not come across one that looks as cute as this! I just had to go back to get it the next day much as the shop was out of the way.
The ice-cream maker set comes complete with recipe cards for 8 different flavours, but they are in Japanese. Hence, I kept the ingredients portion as per the recipe card, but followed the ice-cream making instructions in Keiko Ishida’s “Okashi: Sweet treats made with love”.
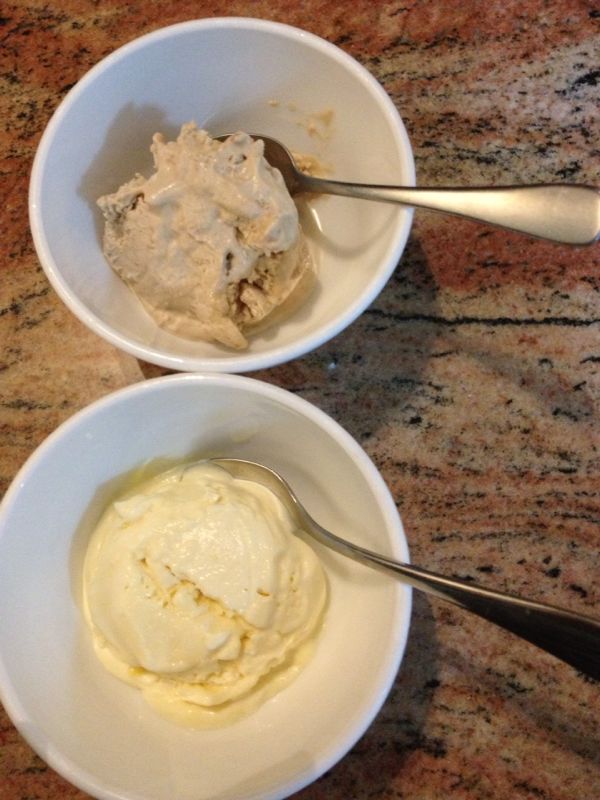
My first homemade vanilla and chocolate ice cream
Take 1 of ice-cream making is pretty much a success I would say. But would prefer the chocolate ice cream to be stronger in flavour and darker in colour. Given that there is higher accessibility to ice cream as I can make it anytime I want, a sidenote to myself: self-control, beware of my expanding waistline.
Homemade Ice Cream
Ingredients adapted from enclosed recipe card
Instructions adapted from Keiko Ishida’s “Okashi: Sweet treats made with love”
Whipping cream 200cc
Milk 50cc
Egg yolk 1
Castor sugar 2 tbsps
Cocoa powder 1 tsp (for making chocolate ice cream)
1. Heat milk in a saucepan almost to the boiling point, then remove from heat and set aside.
2. In a mixing bowl, beat egg yolk and sugar until pale yellow in colour. For making chocolate ice cream, add cocoa powder and mix well.
3. Add warm milk and mix well. Return mixture to the same saucepan and heat gently, stirring constantly, until it thickens to form a custard.
4. Place saucepan into a larger bowl filled with iced water to cool.
5. In a mixing bowl, whip whipping cream until stiff peaks form. Add whipped cream to the custard and fold through. Transfer mixture to the ice cream maker and churn according to the manufacturer’s instructions.
6. Store in the freezer or serve immediately.