.recycling.for.1st.trimester.of.2014.

Following my previous post on a tabulation of what Cycliclapse recycled in the last couple of months of 2013, we are even more motivated and decided to do up another tabulation for the 1st trimester of 2014.

WARNING: Rather long post ahead, but with many images to enjoy too.

This year, Team @ Cycliclapse is still diligently collecting and sending recyclable stuff to “Cash For Trash” on alternate, if not every, Sundays.
For the recent couple of weeks, we were caught up with work stuff and other commitments, so we weren’t able to drop the items off but yet still collecting them.
Hence they have since accumulated to a REALLY HUGE pile as compared to all our previous ones, consisting of countless aluminium cans / plastic bottles / newspapers, plus some other random pieces of old clothes and metal. 2014-04-26-17-07-53_deco[1]Looking at the huge pile, an idea suddenly struck us.
“Let’s make a statement piece that can go viral, before sending them all for recycling.”
And so we started on our planning + execution process…….
(We hope one day this cover of TIME can become real!) IMG-20140414-WA0007[1]After sketching some designs for the dress which we planned on making, it’s down to doing up the real thing in a week’s time. 2014-04-26-17-21-54_deco[1]An old bra was found in the pile of old clothes, so we decided to modify it to be the top part of the dress. 2014-04-26-17-25-25_deco[1]Every single can tab was being hand-sewn onto the bra. 2014-04-26-17-30-20_deco[1]This pile of newspapers (and more) made up the bulk of the lower part of the dress. 2014-04-26-17-33-41_deco[1]Big bag of aluminium cans to make up the train of the dress! 2014-04-26-17-39-27_deco[1]
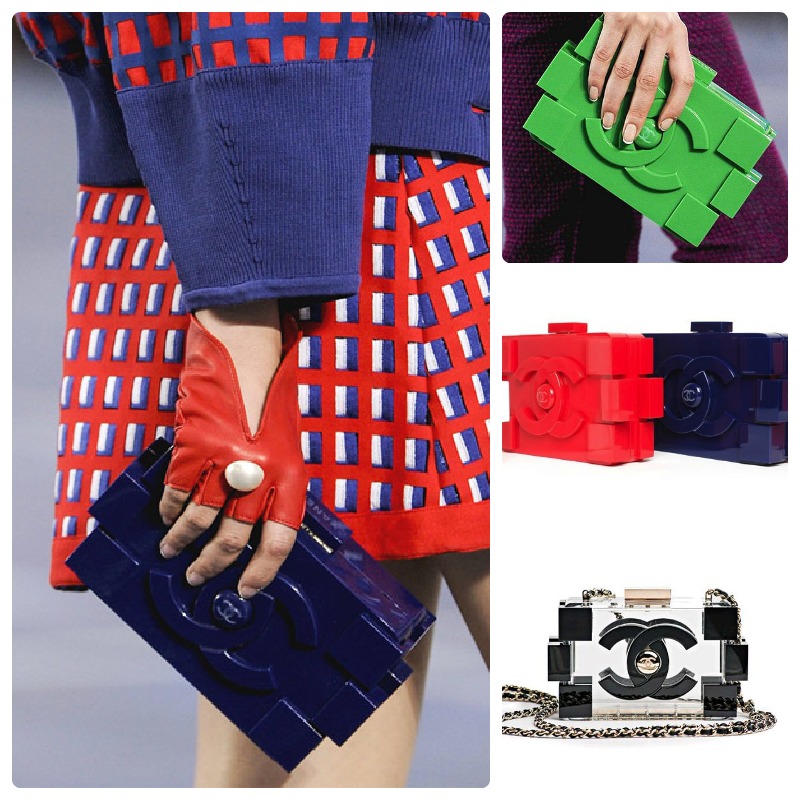
Weaving using magazine papers (to cover a HP laptop box) for… 2014-04-26-17-41-28_deco[1]…my Bottega-cum-Chanel inspired oversized clutch!
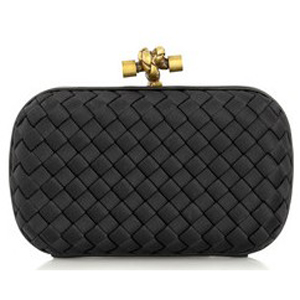
 Hot-Sell-Bottega-Veneta-Impero-Satin-Clutch-113085-black_21324_0Chanel Lego Clutch 2014-04-26-17-48-38_deco[1]We made a headpiece for each of us, including the model! 2014-04-26-17-57-46_deco[1]After putting everything together………
TADAH!!! 2014-04-26-18-21-18_deco[1]2014-04-26-18-26-34_deco[1]All the hard work has been paid off!
We are more than happy with the final result of the whole outfit!!
Thanks lots to our dear model too for wearing our creation!!!

And now to the 2nd half of the post, a tabulation of how much we’ve recycled for this 1st trimester of the year, as well as how much of our own carbon footprints we’ve reduced.

Week 1 (5th Jan):
Aluminium — 1kg
Papers — 48kg
Plastics — 4kg
Money ‘earned’ — S$5.50
PhotoGrid_1389120539213[1]Week 3 (19th Jan):
Aluminium — 1kg
Metal — 2kg
Old Clothes — 5kg
Papers — 55kg
Plastics — 10kg
Money ‘earned’ — S$7.60
PhotoGrid_1390204996343[1]Week 6 (9th Feb):
Aluminium — 3kg
Papers — 17kg
Plastics — 2kg
Money ‘earned’ — S$3.30
2014-02-11-23-56-49_deco[1]Week 8 (23rd Feb):
Aluminium — 2.5kg
Papers — 30kg
Plastics — 2kg
Money ‘earned’ — S$4.50
PhotoGrid_1393134259482[1]Week 10 (9th Mar):
Aluminium — 1.5kg
Plastics — 0.5kg
Money ‘earned’ — S$0.70
PhotoGrid_1398510169887[1]Week 12 (23rd Mar):
Aluminium — 2kg
Metal — 2kg
Old Clothes — 6kg
Papers — 55kg
Plastics — 4kg
Money ‘earned’ — S$8.00
PhotoGrid_1395666681166[1]Week 17 (27th Apr):
Aluminium — 5kg
Metal — 1kg
Papers — 83kg
Plastics — 4kg
Money ‘earned’ — S$11.05
PhotoGrid_1398570621318[1]*GRAND TOTAL*

Aluminium: 16kg (about 300 cans)
We saved 128kg of bauxite, 64kg of chemical products, 0.08 cubic metres of landfill space (when cans are crushed), and 234.21kWh of electrical energy.
(Sources: http://environment.about.com/od/recycling/a/The-Benefits-Of-Aluminum-Recycling-Why-Recycle-Aluminum.htm / http://www.sustainableworld.org.uk/recyc_al.htm)

Metal (all others apart from Aluminium): 5kg
We saved 7.5kg of iron ore, 25kg of coal, 0.27kg of limestone, 0.2% of water used in production, 0.38% of energy needed to make such metals from raw material, 6.4kg of solid waste, reduction in air emission by 0.43%, and reduction of water pollution by 0.38%.
(Source: http://www.benefits-of-recycling.com/recyclingmetals/)

Old Clothes: 11kg
We reduced 39.6kg of carbon dioxide (CO2) emissions, 66,000 litres of water consumption, 3.3kg of the use of fertilisers, and 2.2kg of the use of pesticides.
(Source: http://www.onkaparingacity.com/onka/living_here/waste_recycling/recycling_revolution/dont_waste_your_clothes_give_them_a_second_life.jsp)

Papers: 288kg
We saved 4.91 trees, 2,016 gallons of water, 109.44 gallons of oil, 0.95 cubic yards of landfill space, and 1,152kWh of electrical energy.
(Source: http://environment.about.com/od/recycling/a/The-Benefits-Of-Paper-Recycling-Why-Recycle-Paper.htm)

Plastics: 26.5kg
We saved 18.15 gallons of oil, 53kg of carbon dioxide (CO2) emissions, 0.2 cubic yards of landfill space, and 153.02kWh of electrical energy.
(Sources: http://homeguides.sfgate.com/benefits-savings-recycling-plastic-79284.html / http://environment.about.com/od/recycling/a/benefits-of-plastics-recycling.htm)

Money ‘earned’: S$40.65

Everybody!! Let’s all start/continue doing our part today!!! *juggles bottles and cans*

.Chingay.2014.

Warning: Beware of upcoming flood of images!

Went for the recent Chingay Parade last Friday, courtesy of my dad for the free tickets! My 1st time watching it live! Just nice we were able to film it too!

Man, were the performers awesome!

On the way to the audience seats. 

Waiting for the show to start! 

Opening act! 

Arrival of PM Lee and Mrs Lee! 

Super long banner!! 

Lotsa white horses….. 

…… paved way for the big guy! Trojan much??? *kidding* 

Pegasus came too! 

Then we had a float with some of Singapore’s iconic spots! Merlion / Gardens By The Bay / Marina Bay Sands / Esplanade / Sentosa / Changi Airport 

With a bunch of Gods of Wealth following behind! 

Performers on stilts! 

Lion dance troupes! 

Huge banners which even the performers had difficulty keeping them up. 

Confucius came too!

Dragons and fire crackers! 

More Gods of Wealth! 

Me like Black Horse. 

Malays’ float. 

Indians’… 

Ballerinas! 

There were many… 

Many… 

MANY of them! 

Cha cha! 

PAYM’s float! Broadway style! 

NUS’s float! 

Japanese’s float! 

Performers from Indonesia! 

Love their costumes!!! 

Koreans in traditional outfits. 

Cute! Circus style! 

The dragon playground! 

Getai’s float! 

Sea of gold performers with the getai float. 

CDCs’ float! 

Finally! The one which my dad participated in! 

Nearing the end! 

Waiting for the moment…… 

Revealing the end products! 

Hand-knitted by 12,000 people! 

SPECTACULAR! ! ! ! !

Till next year! ! ! *throws confetti*

.Mad.Season.1.:.Beauty.Series.Ep.8.


KONNICHIWA~~~!!!
Welcome to the 8th, as well as the last episode of Beauty Series in Mad Season 1!!! *SOBX*

For a boomz ending to this series, Ving decided to show it through a more power Gothic makeup look!
T A D A H H H ! ! !
Check out the embedded video above for the whole process!!

With this, I shall end the Beauty Series in Mad Season 1!!!
Hope that everyone enjoyed and tried out the stuff in all the episodes in this series!!
Thank you very much for staying with me throughout!!

Do stay tuned to the last episode of Cooking Series which will be out on Friday!!!
THANKS LOTSSS!!!!! *juggles eyeliner & mascara*

.Mad.Season.1.:.Beauty.Series.Ep.7.


ANNYOHASAEYO!!!
Welcome back, and to the 7th Episode of Beauty Series in Mad Season 1!!!

We usually use emoticons nowadays to express how we feel at the moment.
How about using colors instead??
So for today!!!
Ving decided to do up this Mood-O-Meter Nail Colors.
Basically, choose 10 nail colors and apply a color on each nail.
*paint paint paint*
TADAH!!!
Depending on what your mood is, raise the particular finger which represents that. *teehee*

Do stay tuned for the 7th Episode of Cooking Series which will be out on Friday!!!
Kindly support us!!! Thankssssss!!! *juggles nail polish bottles*

.Mad.Season.1.:.Beauty.Series.Ep.6.

H I ! ! ! ! !
Welcome back, and to the 6th Episode of Beauty Series in Mad Season 1!!!
Have you been beautifying yourself lately???

For today!!!
Ving recently tried out this Violent Lips Temporary Tattoo!
Zebra print!!!
No my mouth isn’t this big, lips aren’t this thick haha…
Basically you’ll need to trim accordingly to the size of your mouth and lips thickness.
Not too well-done, but I think good first try on my part!! *teehee*Verdict:
Great for dress-up theme parties!
Requires some practise though before you can get it perfect.
(The demo video makes it look so easy to put it on!)

Do stay tuned for the 6th Episode of Cooking Series which will be out on Friday!!!
Kindly support us!!! Thankssssss!!!! *smacks zebra lips*

.Mad.Season.1.:.Beauty.Series.Ep.5.


KONNICHAWA!!!
Welcome back, and to the 5th Episode of Beauty Series in Mad Season 1!!!

For today!!!
*WARNING* This might seem to look like a narcissistic post.
Ving used to keep straight bangs ‘cos it helps to shape her face well, which became side fringe when I didn’t trim it when it grew out.
So now that I’m tired of keeping the side fringe that seems to be going bit out of shape, the thought of changing the fringe’s style came across my mind.
Yes. I do look rather bored of having side fringe, don’t I??
In order to save some money (cheap thrill), I’ve decided to trim my own fringe!!!
Technically speaking, you just need a pair of scissors and a comb to perform this task right?
I don’t own a pair of scissors specially for cutting hair, hence here’s what I used….. *teehee*
(It’s smaller in real life than what’s appeared here, and more for cutting paper.)
*snip snip snip*
VIOLA! ! !
(Bit crooked I know, and I over-trimmed the length till it only covers half of my forehead.)
After more minor trimmings on subsequent couple of days…
I’ve missed you so, my straight bangs!!!
Feels good to have my straight bangs back!!!
Start trimming your own hair today too!!! (It’s easier to start from the fringe!)

Do stay tuned to the 5th Episode of Cooking Series which will be up on Friday (8th Nov)!!
Kindly support us!!! Thanksssss!!!! *throws hair strands*

.Mad.Season.1.:.Beauty.Series.Ep.4.


你好!!!
Welcome back, and to the 4th Episode of Beauty Series in Mad Season 1!!!
Have you checked out the previous episodes and primped yourself well???

For today!!!
Ving tried out this Foot Exfoliating Mask that was bought during a recent Hong Kong trip, from a chain called Bonjour (similar to Sasa).
Previously I’ve tried foot mask from Tony Moly, and it was actually quite good.
So I had been anticipating how will the effect be for this.
Here’s how the mask looks like!
Wash your feet clean already, then wear them like shoes!
Leave them on for 45-60mins, during which you can just do your own stuff while waiting for the liquid to be absorbed into your soles.
When time’s up, rinse off the mask liquid with warm water.
Couple of days later…….
Ok the image of my peeling sole is rather unglam, but a little ‘sacrifice’ to show you how it be like after using the mask hahaha…..
A week after, my soles are still at the last stage of the peeling process.

Try to use a foot mask once every 1 or 2 months!
Cheers to soft and smooth soles/feet!!!

Kindly support us!!! Thankssssss!!!!! *throws foot masks*

.Mad.Season.1.:.Beauty.Series.Ep.3.


BONJOUR!!!
Welcome back, and to the 3rd Episode of the Beauty Series in Mad Season 1!!!

For the previous episode of this Beauty Series, Ving helped Ginzy dyed her hair to try cover the whites.
Since her hair length’s rather short, there was actually still some hairdye left over in the bottle.
Hence for today!!!
Ving attempted this little experiment with the remaining hairdye, while waiting for the hairdye colour to be absorbed onto Ginzy’s hair.

1st Step:
Prepare a pair of fake lashes.
2nd Step:
Apply a thick layer of the hairdye onto the fake lashes.
3rd Step:
Leave it for (the same amount of time as dyeing human hair) the hairdye to get absorbed in.
4th Step:
When the time’s up, rinse off the hairdye.

End result???
Verdict:
Hairdye for human hair isn’t able to be used to dye fake lashes that are made of fibres.
Too bad!!! Now we know hahaha…. >.<”

Do stay tuned for the 3rd Episode of the Cooking Series which will be out on Friday!!!
Kindly support us!!! Thankssssss!!!! *throws fake lashes*

.Mad.Season.1.:.Beauty.Series.Ep.2.

http://www.youtube.com/watch?v=SaDQfSIwp24
BONJOUR!!!

Welcome back, and to Episode 2 of the Beauty Series in our Mad Season 1!!!
Hope you’ve enjoyed the previous episodes of our various series so far!!!

For today!!!
Ving took up the challenge of helping her sidekick Ginzy (pronounced as Gin-Gee) cover her uncountable amount of white hair with DIY hairdye.
L’oreal recently came up with this new Fashion series of hairdye colors, hence we decided to give it a shot.
Me like the Black+Gold color theme…….
1st Step:
Apply the “Protective Pre-Color Serum” onto dry hair. Leave it in. No need to wash off.

2nd Step:
Mix the “Protective Creme Colorant” and “Creme Developer” together well.

3rd Step:
Put on the plastic gloves that are provided.

4th Step:
Apply the mixture onto hair evenly.
Verdict:
The color actually turns out rather nicely.
However, it doesn’t help much in covering white hair. It only did for the 1st day, but subsequently the white hair became obvious again.
The best color to cover white hair is actually still black color, which can hide white hair for a longer period of time.
This range is still worth a try if you aren’t looking at covering white hair.
Plus it does smell nice too!!

Do stay tuned for the 2nd Episode of our Cooking Series to be out on this Friday!!!
Kindly support us!!!!! Thankssssss!!!!!! *throws confetti*

.Mad.Season.1.:.Beauty.Series.Ep.1.


HELLO!!!

Welcome back and to the 2nd series of our Mad Season 1!!!
If you’ve already guessed from the heading, this 2nd series will be about Beauty!!
We’ll be touching on different aspects of Beauty for this series, so we hope it can be like a surprise for you when you come back to check out new episodes (as of the same for the other 2 series too).

For today!!!
Ving recently tried out this Character Print Nail Art set from Korea which was a gift from sidekick Ginzy.
It looks really interesting!

The instructions were in Korean though. But based on the images provided, you’ll be able to understand quite easily the proper way to do this nail art.
So!! Based on my understanding, here’s how we do it……………….

1st step: Apply 2 layers of the white nail polish onto your nails.
2nd step: While waiting for the nail polish to dry, you can cut out small pieces of the pattern design which you would like to have on your nails.
For me, I chose a cupcakes design as well as this cute skulls design (not pictured below).
(Plus a random cameo by Zown de Clown.)
 3rd step: Apply the Transfer Solution (hot pink bottle) onto a small piece of the design which you’d cut out earlier (on the side with the pattern). Then press it onto your nail before the solution dries up.

This step’s bit tricky. After I tried on few of my nails, I realised that it’ll be better if you apply a layer of the solution onto the flip side of the patterned paper as well while it’s on your nail.
Reason being that the paper will actually get stuck onto your nails too together with the design.
Applying onto the flip side as well will help the design to get stuck onto your nails better, and reduces the chances of the paper getting stuck together.
Think of it as trying to ‘paste’ those temporary tattoos onto your skin.

Here are the 1st 2 nails which I tried on with the skull pattern, which didn’t come out that nicely and obvious.
 After ‘pasting’ on the cupcakes design as well, which not the full pattern came out too.

Conclusion: It’s still worth trying! Just that it’ll require some practise before you’ll be able to get the perfect full pattern onto your nails. Still can be a fun activity for a girly night-in with your girlfriends!! ^_^

Do stay tuned for the 1st episode of our 3rd series which will be up on this Friday!!!
Kindly support us!!!!! Thankssssss!!!!!!!!